



Scrim tape is a self-adhesive open-weave mesh, almost always glass fibre, bedded across plasterboard joints to reinforce them before filling or skimming. It sits centred over the line where two boards meet and spreads the stress that concentrates there, so the finished surface is far less likely to crack along the board line.
That is the short answer. The part that separates a competent finisher from a callback is knowing where the mesh belongs, where it does not, and what it is actually doing structurally.
Used correctly, it is one of the cheapest forms of insurance on a job. Used in the wrong place, it guarantees the crack it was meant to prevent.
What Is Scrim Tape Made From?
It is an open-weave glass-fibre mesh with a pressure-sensitive adhesive backing. The open weave is the whole point of the design.
That weave lets jointing compound or finish plaster pass through the mesh and bond to the board face on both sides of the joint. The tape ends up locked inside the material rather than floating as a separate layer.
Typical specification on most vans:
- Widths: 48mm and 50mm cover the vast majority of flat board joints.
- Roll lengths: 90m and 150m are the common trade sizes.
- Wider grades: 100mm and above are sold for repairs and for bridging damaged areas.
- Treated grades: Some products carry an anti-mould treatment for bathrooms, kitchens and other high-humidity rooms.
Where the name comes from
The term is inherited from traditional lath and plaster work, which used hessian or jute scrim across joints and angles for exactly the same reason. What changed is the material, not the principle.
Which product standards actually apply
This is worth getting right, because it is commonly misstated.
BS EN 13963 is the product standard for jointing materials used with gypsum boards. It covers jointing compounds and paper jointing tapes. It does not cover tapes made from materials other than paper, which means glass-fibre mesh sits outside its scope.
That is not a loophole to lose sleep over, but it does have a practical consequence. The performance of a mesh tape rests on the manufacturer’s own data and on the tested system it forms part of, rather than on a harmonised product standard.
So ask for the product data sheet, and use the tape with the compounds that manufacturer specifies. Tape, compound and board are assessed together as a system, not as three unrelated items pulled off a merchant shelf.
Why Is Scrim Tape Used Across Plasterboard Joints?
Because plasterboard moves, and the joint is the weakest line in the surface.
Movement arrives from several directions at once:
- Frame shrinkage: Timber frames dry out and shrink for months after construction.
- Structural deflection: Timber and steel structures flex under load.
- Humidity swings: Internal conditions change hard between a heating season and a summer, and gypsum responds.
- Thermal movement: Boards expand and contract slightly with temperature.
None of that is a defect. It is normal building behaviour, and the finished surface has to absorb it.
Why an unreinforced joint fails in a straight line
Set jointing compound and finish plaster are strong in compression and weak in tension. On an unreinforced joint, nothing crosses the gap to resist a pulling force.
Any movement between the two boards therefore opens a clean, straight crack precisely along the join. That is why failed joints crack in a dead straight line while the rest of the wall stays sound.
The mesh gives the joint tensile strength across that gap. It does three jobs at once:
- Distributes stress: Load that would concentrate on a hairline gap gets spread across the full tape width and out into the board faces.
- Binds the filler: Even where micro-cracking occurs in the compound, the mesh holds the material together instead of letting a crack run to the surface.
- Provides a key: The open weave gives the setting material something to grip through, rather than relying on a bond to a smooth paper face alone.
Scrim tape does not stop a building moving. It stops that movement showing up as a crack in the client’s hallway eighteen months after handover.
Scrim Tape vs Paper Tape: Which One Goes Where?
Both are jointing tapes. They are not interchangeable, and picking the wrong one causes a large share of cracked joints on finished work.
| Self-adhesive mesh tape | Paper jointing tape | |
|---|---|---|
| Material | Open-weave glass fibre | Solid paper, creased centre line |
| Fixing | Self-adhesive, applied dry | Bedded into a coat of compound |
| Tensile strength | Good, with slight elasticity | Higher, effectively no stretch |
| Best for | Flat joints, board repairs, work being skimmed | Internal angles, tape-and-joint systems, higher-risk joints |
| Internal angles | Not suitable | Purpose designed |
| Speed | Faster to apply | Slower, needs a bedding coat |
| Product standard | Outside BS EN 13963 scope | Covered by BS EN 13963 |
The compound matters as much as the tape
Mesh has a small amount of give in it. Manufacturer guidance is consistent on what to do about that: bed mesh tape in a setting compound, which hardens by chemical reaction, rather than relying on an air-drying compound alone.
The setting product takes the flex out of the joint and locks the tape solid. Where a wall is being skimmed, the finish plaster performs that job over the taped joint.
Internal angles are paper, every time
Wall-to-wall junctions, wall-to-ceiling junctions and reveals around openings carry the highest movement of anywhere in a room. Mesh will not fold to a crisp, accurate line.
Major UK plasterboard manufacturers specify paper tape for internal angles. If a van is carrying nothing but mesh, the angles are already compromised before anyone starts.
How Is Scrim Tape Applied Correctly?
The sequence matters as much as the product does.
- Check the boarding first: Confirm fixings at the correct centres, properly supported edges, no four-way joints, and boards tight to the frame with no springing. Tape reinforces a sound joint. It does not rescue a bad one.
- Clean the joint line: Gypsum dust on freshly cut edges kills the adhesive, and dot-and-dab work often leaves adhesive smears across the joint. A quick pass with a soft brush before taping prevents the tape lifting later.
- Deal with wide gaps before taping: Manufacturer guidance generally limits self-adhesive mesh to narrow joints, with wider gaps filled first, allowed to set, then reinforced with paper tape. Check the figures on the data sheet for the system in use, because tolerances vary between manufacturers. Stretching mesh over an open void achieves very little.
- Centre the tape and butt the ends: Run the tape centrally over the joint, cut cleanly at the end of each run, and butt the ends together. Never overlap. Doubled mesh creates a ridge that shows under any side light from a window, and no amount of skim will fully hide it.
- Bed it in: Typical hand jointing practice is to embed the tape in a band of setting compound around 100mm wide, overcoating immediately to fill tapered board edges fully, then feathering out onto the board face.
- Build the coats: Once set and dry, apply a second coat feathered around 50mm beyond the first, and a third coat feathered a further 50mm beyond that where needed.
- Sand and seal: Sand back to a flat, smooth surface, then seal boards and joints with a drywall primer or sealer before decoration so suction is even across the wall.
Where Scrim Tape Should Never Be Used
This is where jobs go wrong, and some of it is a safety matter rather than a finish matter.
- Internal angles: Use paper tape.
- Gaps beyond manufacturer limits: Fill and set first, then reinforce properly.
- Fire stopping: Mesh tape is not a fire stopping product. Head-of-wall gaps, deflection heads, service penetrations and cavity barriers all require tested fire stopping systems installed to the manufacturer's tested detail. Taping over a gap in a fire resisting element is a serious defect, not a shortcut.
- Designed movement joints: Where a specification calls for movement joints and beads at set centres, tape is not a substitute for them.
- Live cracks in existing plaster: Cut out, establish the cause, then repair. Tape over a moving crack transfers the problem rather than solving it.
- Poor boarding: Wrong screw centres, unsupported edges and over-spanned boards will crack through any tape on the market.
How Does Joint Treatment Affect Fire and Acoustic Performance?
This is where jointing stops being cosmetic.
Fire resistance and sound insulation are properties of a complete tested system, meaning the board, the framing, the fixings, the insulation and the joint treatment together. Change one element outside the tested specification and the tested classification no longer reliably applies to what has been installed.
Two consequences follow on site:
- Air paths destroy acoustic performance: Unsealed perimeters, gaps at floor and ceiling junctions and unfilled joints let sound straight through a wall specified to stop it. Perimeter sealing is done with the specified acoustic sealant, never with tape.
- Substitution invalidates the test evidence: On fire rated and acoustically rated construction, use the tape and compound named in the system specification, and photograph the joint treatment before it is covered.
Which guidance applies where you are working
Building regulations are devolved, so the right document depends on the country, not on the UK as a whole.
- England: Approved Document B covers fire safety and Approved Document E covers resistance to the passage of sound. Both sit within the approved documents index.
- Wales: Welsh Government publishes its own Part E guidance.
- Scotland: Work to the Building Standards Technical Handbooks, domestic and non-domestic.
- Northern Ireland: Work to the Technical Booklets supporting the Building Regulations (Northern Ireland).
Two changes worth knowing about
Approved Document B in England is being amended in stages. A further set of amendments takes effect on 30 September 2026, with transitional provisions where building control was notified before that date and the work has started and is sufficiently progressed.
Those particular changes deal mainly with escape provisions, staircases and sprinklers rather than jointing. The point for anyone quoting the document is simply to make sure you are reading the edition that applies to your project.
The change that does touch jointing materials came earlier. National fire test classes have been withdrawn for reaction to fire, leaving BS EN 13501-1 as the classification route. Reaction to fire is one of the characteristics declared for jointing compounds, so any older paperwork quoting the withdrawn national classes should be treated as out of date.
What Are the Health and Safety Rules for Taping and Jointing?
Jointing itself is low risk. Sanding the joints afterwards is not, and it is one of the most under-controlled tasks in fit-out work.
The Health and Safety Executive publishes guidance specifically on sanding taped and covered plasterboard joints. It is worth reading in full before the next first fix.
What the exposure numbers mean
Uncontrolled dry sanding produces peak exposures of around 10 mg/m³, against a limit of 4.0 mg/m³ for respirable dust averaged over eight hours. The work usually happens indoors, in enclosed rooms, where dust has nowhere to go.
Two points of context matter here:
- There is no gypsum-specific limit: The figures above come from the general dust limits published in EH40, which sets 10 mg/m³ inhalable and 4 mg/m³ respirable as eight-hour averages.
- A limit is not a safe level: The legal duty is to reduce exposure as far as reasonably practicable, not simply to stay the right side of a number. HSE is explicit about this in its guidance on workplace exposure limits.
Gypsum sits in the lower-toxicity category in HSE’s construction dust guidance, which is a different category to respirable crystalline silica from concrete, brick and stone. Lower toxicity does not mean no control required. Regular exposure to any construction dust across a working life damages the lungs and airways.
Controlling the dust
Work through the controls in order:
- Prevent: Reduce the need to sand at all through better application and finishing technique.
- Control at source: Use sanding equipment fitted with on-tool extraction and an H, M or L class extraction unit. Match the flow rate to the work and keep hose connections tight and leak free.
- Maintain: Check hoods, hoses, filters and warning devices regularly for damage.
- Examine and test: Under Regulation 9 of the Control of Substances Hazardous to Health Regulations 2002, local exhaust ventilation must be thoroughly examined and tested by a competent person at least once every 14 months, and the records kept for at least five years.
- Review: Decide whether health surveillance is needed, taking competent occupational health advice where required.
On respiratory protective equipment, HSE notes that where extraction is working effectively on this task, dust levels fall sharply and RPE is not needed. That conclusion depends entirely on the extraction actually working.
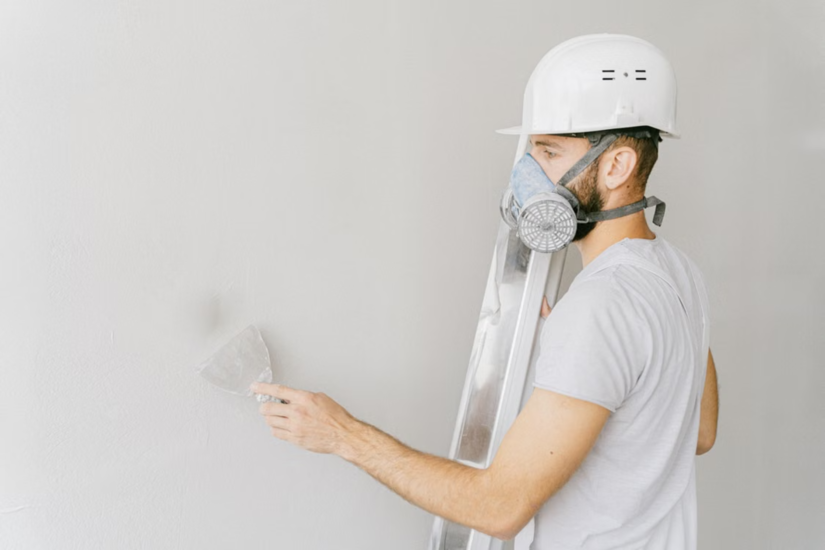
Where extraction is not used, is not working, or where the COSHH assessment calls for it, RPE is required. Any tight-fitting mask must be face-fit tested to the individual wearing it, and worn clean-shaven at the seal.
Working overhead, lifting and site duties
Ceiling work deserves separate thought. Dust falls directly into the breathing zone, so extraction matters more overhead, not less.
- Access: Equipment must be suitable for the task and properly used under the Work at Height Regulations 2005. HSE publishes work at height guidance covering selection and use.
- Eye protection: Sensible whenever working above head height.
- Skin: Gypsum-based compounds are drying and mildly irritant, so gloves are worth wearing on any sustained jointing run.
- Manual handling: Boards and bagged compound are a common source of back injury. Assess lifts under the Manual Handling Operations Regulations 1992 and use mechanical aids where available.
- Site planning: On notifiable projects, dust-generating work should be planned and controlled under the Construction (Design and Management) Regulations 2015 rather than left to whoever is holding the sander.
All of this sits under a COSHH assessment completed before work starts, not written up afterwards.
What Are the Rules on Plasterboard and Gypsum Waste?
Offcuts and waste are a legal duty, not a skip decision, and this catches out small contractors regularly.
Gypsum-based waste must not go to a landfill cell that accepts biodegradable waste. In oxygen-depleted landfill conditions, gypsum can generate hydrogen sulphide, which is both toxic and strongly odorous.
What that means in practice:
- Separate it: Segregate plasterboard and gypsum waste for reuse or recovery, in line with the waste hierarchy.
- Recycle where you can: Clean, uncontaminated plasterboard is recyclable, and merchants and suppliers can usually advise on take-back or collection.
- Where separation is not possible: Mixed waste containing gypsum must go to a landfill cell that accepts no biodegradable waste, and it must be properly classified and characterised.
- Do not wash it away: Mixed or dry compound must never go into drains or surface water.
Environmental regulation is also devolved, so the enforcing body differs by country: the Environment Agency in England, Natural Resources Wales, SEPA in Scotland, and the Northern Ireland Environment Agency.
Good plastering work depends on getting the preparation and joint treatment right. TradeFox offers interactive plastering training that helps you practise essential techniques step by step, review the details, and build your skills at your own pace.
Getting the Detail Right
Jointing is a low-cost consumable that carries a disproportionate amount of a job’s reputation. The finish that gets remembered is not the one that looked good on handover day. It is the one that still looks good after the first heating season.
For anyone building towards a career in drylining and plastering, joint treatment is a fair measure of whether someone knows the trade. It rewards understanding the reason behind each rule rather than copying what the last gang on site did.
Working through a CSCS route, an apprenticeship, or building up on-site experience? Get the jointing detail specified and executed correctly, and the rest of the finish tends to follow.