Drylining has fundamentally changed the speed and efficiency of modern interior construction. Traditional wet plastering remains highly relevant across the industry, but the demand for rapid project turnaround has cemented tape and jointing as a dominant interior finishing method. Getting Tape and Joint Systems Explained accurately helps tradespeople see exactly why this technique is heavily favored on large commercial sites and fast track residential builds. It provides a seamless finish ready for immediate decoration without the extended curing times associated with full skim coats. Understanding the technical mechanics of these systems is crucial for any tradesperson aiming to deliver flawless, snag free walls that pass rigorous site inspections.
The Core Components Of A Jointing System
Executing a seamless finish requires a deep understanding of the materials involved and how they interact with each other. Having Tape and Joint Systems explained at their core involves bridging the structural gaps between plasterboard sheets to create a monolithic surface that behaves like a single, continuous wall. The two primary components dictating the success of this process are the jointing tapes and the compound materials.
- Paper tape offers the highest tensile strength and is the recognized professional standard for internal corners and flat joints where structural movement or cracking is a primary concern.
- Self adhesive fiberglass scrim tape is significantly faster to apply but lacks the sheer lateral strength of fully embedded paper tape.
- Many UK site specifications explicitly mandate paper tape over fiberglass scrim to guarantee long term structural integrity under building settlement.
- Setting compounds cure via a strict chemical reaction with water, making them ideal for initial bedding coats because of their rapid hardening properties and incredibly low shrinkage rates.
- Mixing setting compounds requires perfectly clean buckets and fresh water to prevent accelerated chemical setting times.
- Air drying compounds cure purely through moisture evaporation, providing a softer, smoother, and easily sandable surface perfect for the final finishing coats.
Achieving Perfectly Flat Finishes
The ultimate goal of any drylining finishing process is to make the seams completely invisible to the naked eye under any lighting condition. This requires meticulous application across three distinct stages. Tradespeople must master the taping coat, the bedding coat, and the final finishing coat to achieve a truly flat surface.
- Tapered edge plasterboard is explicitly designed by manufacturers to accommodate the combined thickness of the jointing tape and the successive layers of compound.
- Using square edge plasterboard for flat joints creates an immediate raised bump that is nearly impossible to feather out invisibly.
- The first stage involves filling the tapered recess with a setting compound and firmly embedding the paper tape with a jointing knife or trowel to squeeze out any trapped air pockets or excess mud.
- The second bedding coat fills the recess perfectly flush with the surface of the plasterboard sheet.
- The final finishing coat is feathered out slightly beyond the tapered edge to create an imperceptible transition between the jointed area and the bare board face.
Feathering is a critical manual skill that involves applying localized pressure to the outer edge of the finishing trowel. Leaving harsh ridges or thick edges directly leads to excessive sanding and poor final decorative results. The application of the compound should be so precise that sanding becomes a minor polishing task rather than a heavy material removal exercise.
Managing Environmental Conditions
The curing and drying times of jointing compounds are heavily dictated by the specific environmental conditions present on the construction site. Failing to account for temperature and humidity leads directly to system failure, cracking, and poor adhesion.
- Setting compounds require a minimum ambient temperature to trigger the chemical hardening process effectively.
- Working in freezing conditions stops the chemical cure, resulting in a weak, powdery joint that will fail instantly under stress.
- Air drying compounds require adequate ventilation to allow the moisture to evaporate from the wall surface into the atmosphere.
- High humidity environments trap the moisture within the drying compound, significantly extending the time required between coats.
- Applying a second coat of compound over a first coat that is not fully dry traps moisture and causes the entire joint system to blister and peel away from the plasterboard.
The Mechanics Of Flashing Prevention
Flashing is a severe decorative defect where the exact outline of the joints remains highly visible through the final paint finish. This phenomenon is often mistaken for a poorly sanded or raised joint, but it is fundamentally a problem of varying surface porosity. The jointing compound and the paper face of the unpainted plasterboard absorb moisture at completely different rates.
- When decorators apply standard emulsion paint directly over an unsealed drylined wall, the porous joint compound sucks the moisture out of the paint much faster than the surrounding board face.
- This differential suction alters the binder concentration and sheen level of the paint, creating distinct, unsightly bands across the wall under critical lighting.
- Seeing Tape and Joint Systems Explained through the lens of microscopic porosity highlights the absolute necessity of applying a proprietary drywall primer or a high quality drywall sealer before standard painting operations begin.
- Mist coating with thinned contract matt is often insufficient for drylined walls because it does not equalize the high suction contrast as effectively as a dedicated micro polymer drywall sealer.
- Over sanding the joint and inadvertently exposing the raw paper tape beneath the compound will also cause immediate flashing and severe texture variations in the final finish.
Sanding Control And Surface Preparation
Sanding is the most labor intensive and potentially hazardous phase of the tape and jointing process. Professional tradespeople do not rely on heavy sanding to aggressively shape the joint. They rely on sanding merely to polish a well applied, flat compound. Applying massive amounts of filler with the intention of grinding it flat later is an amateur approach that wastes time, wastes materials, and creates completely avoidable airborne hazards.
- Utilize a professional pole sander equipped with 120 or 150 grit abrasive mesh for the main broad wall areas to maintain a perfectly flat sanding plane.
- Abrasive mesh prevents rapid clogging and lasts significantly longer than traditional solid sandpaper.
- Utilize flexible hand sanding blocks with fine grit sponges for delicate internal corners to avoid accidentally gouging the adjacent bare board face.
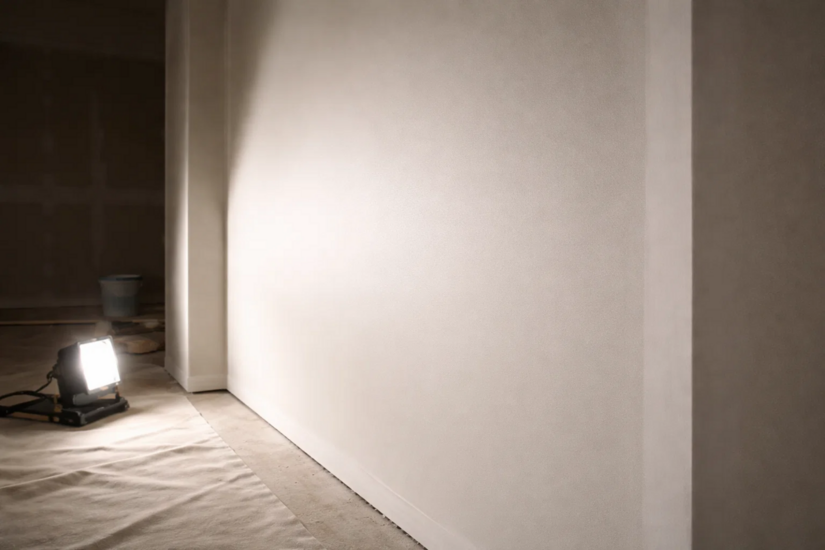
- Shining a harsh raking light or a dedicated inspection lamp directly across the wall surface during the sanding process will immediately highlight any hollows, ridges, or imperfections before the decorator ever arrives on site.
Health, Safety, And Dust Extraction Compliance
Drywall sanding generates massive volumes of extremely fine dust. This dust is not just a frustrating site nuisance. It is a severe occupational health hazard heavily regulated in the UK under the Control of Substances Hazardous to Health regulations. Keeping Tape and Joint Systems Explained safely means always prioritizing respiratory protection and mechanical extraction at the source. Sweeping drywall dust with a standard site broom simply launches the hazardous particulates back into the breathing zone of everyone in the vicinity.
- Inhalation of gypsum dust causes severe respiratory irritation, asthma aggravation, and long term throat issues.
- Exposure to the silica dust often found in specific jointing compounds leads directly to debilitating, irreversible conditions like silicosis.
- The use of a specialized M class construction vacuum extractor is a strict UK regulatory requirement for safely managing this specific type of fine construction dust.
- Standard L class site vacuums or domestic hoovers are completely inadequate, unsafe, and illegal for extracting hazardous airborne dust on commercial construction sites.
- Tradespeople must attach the M class extractor directly to the power sander or pole sanding head to capture the harmful dust at the source before it ever enters the site atmosphere.
- Wearing a face fitted FFP3 respirator mask is absolutely mandatory during all sanding and clean up operations, regardless of the quality of the extraction equipment being used.
If you want to get this stage right the first time and build the same steady habits across decorating jobs, Tradefox has simple, guided learning you can follow at your own pace and apply straight to real work.
Conclusion
Mastering the drylining finishing process requires deep technical knowledge, highly refined manual dexterity, and a strict, uncompromising adherence to site safety protocols. When executed correctly, these systems offer an incredibly fast, highly durable, and perfectly flat alternative to traditional wet plastering.
Preventing flashing through proper surface sealing, minimizing sanding through accurate initial trowel work, and managing hazardous dust through compliant M-class extraction are the true hallmarks of a professional dryliner. Tradespeople who respect the materials, understand the underlying porosity issues, and prioritize respiratory safety will consistently deliver exceptional interior finishes that easily pass inspection on every single project.