Getting plasterboard joints right is the difference between a wall that reads as one flat plane and one that shows every seam the moment a low light catches it. For tradesmen, jointing is where the skill of dry lining is most exposed, and least forgiving. This guide covers the taping, feathering, and crack-prevention techniques that separate a clean finish from a callback.
It is written for working tradesmen and for those training into the trade. It is not a DIY walkthrough.
Why Plasterboard Joints Fail
Most joint failures trace back to one of three causes:
- Poor board fixing. Boards that are not screwed tight to the framing will flex, and movement across a seam puts the jointing system in tension.
- Incorrect compound application. Too thick a bed, skipped tape, or recoating before the previous coat has dried.
- Structural movement. Thermal movement, settlement, and timber drying out behind the board.
Understanding which one you are dealing with matters, because the fix for each is different. No jointing system can absorb unlimited movement, which is exactly why board layout and movement joints exist.
Fix the Boards First
Before any tape goes on, every board needs to be screwed home properly. Screws should sit just below the paper face, dimpled in without tearing the surface. Fixing centres are typically in the region of 200mm to 300mm, but this is system-specific and changes with board type, single or multi-layer construction, and whether you are working walls or ceilings. Always confirm centres against the manufacturer’s fixing schedule for the system you are installing rather than relying on a single figure.
Tapered Edges Versus Cut Edges
Plasterboard is manufactured with tapered long edges for a reason: tape and compound sit in the recess and finish flush with the board face. Where two tapered edges meet, you get a natural channel for the jointing system. This is the strongest and easiest joint to finish.
Butt joints and cut edges are the trouble spots. A butt joint has no recess, so the build-up sits proud and the compound has to be feathered much wider to hide it.
A few layout habits make the work easier:
- Plan board runs so tapered edges meet wherever possible.
- Keep butt joints to a minimum.
- On ceilings, stagger boards in a brick-bond pattern so seams do not line up into a continuous crack line.
Taping Plasterboard Joints
Taping is the structural stage of the job. The tape, not the compound, carries the tensile load that holds the seam together across small movement. Manufacturers position paper tape specifically to reinforce joints and internal angles and reduce the risk of cracking.
Paper Tape Versus Mesh Tape
There are two tapes you will reach for:
- Paper tape. The strongest option, especially at internal angles. It has no adhesive of its own, so it must be bedded into a wet coat of compound.
- Self-adhesive mesh (scrim) tape. Faster to apply and convenient, but generally weaker in tension than paper. It is best paired with a setting-type compound and kept off critical butt joints unless the system is rated for it.
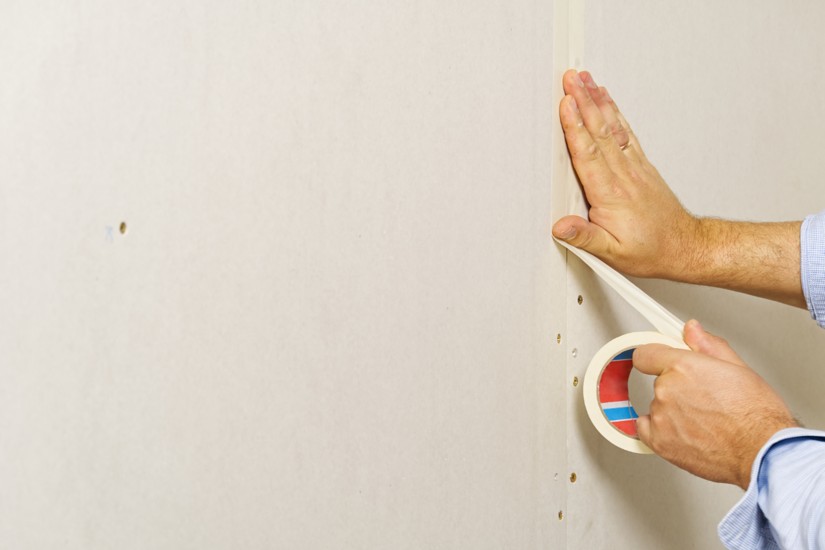
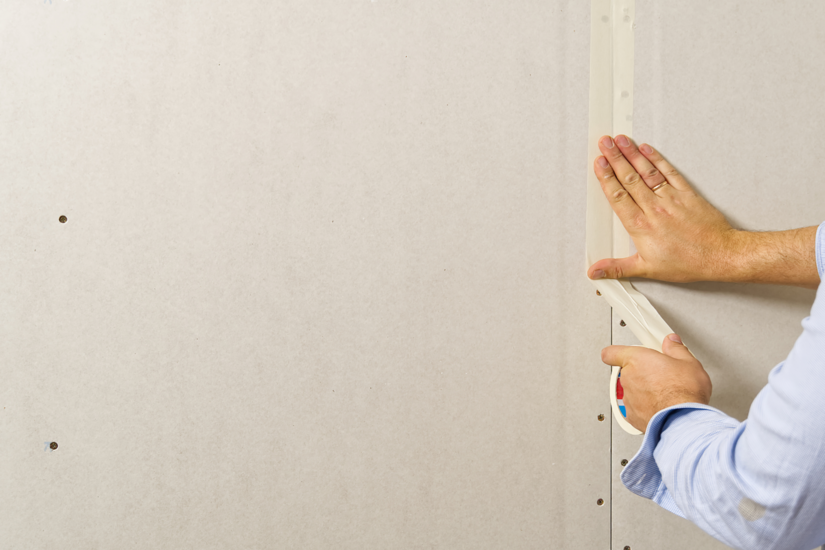
Bedding the Tape
For a flat joint, the sequence is straightforward:
- Load the recess with a jointing compound, filling to the shoulders of the taper. Manufacturer systems commonly fill to around 175mm wide on the first pass.
- Press the paper tape into the wet bed with a taping knife.
- Draw the knife along the length to squeeze out excess compound and any trapped air.
Air bubbles under paper tape will blister later, so work them out completely. Leave enough compound under the tape to bond it, but not so much that it floats off the joint.
For internal angles, crease the paper down its centre line and bed both sides in one pass. For external corners and any edge that will take knocks, fit a metal or composite corner bead rather than relying on tape alone.
Feathering: Building and Blending the Coats
Feathering means spreading each successive coat wider than the last and tapering the edges down to nothing, so the build-up over the joint disappears into the surface.
A typical three-coat system runs like this:
- First coat (bedding). Holds the tape.
- Second coat (fill). Applied wider, around 200mm, to cover the tape and start building level once the first coat is dry.
- Third coat (finish). A wider blade again, often 250mm to 300mm, feathered out so the edges blend seamlessly into the board.
Why Thin Coats Beat One Thick Coat
Each coat must be fully dry before the next, unless you are using a setting-type compound built for same-day recoating. Air-drying compound shrinks as it dries, so several thin coats outperform one heavy coat. Thin coats shrink less and feather cleaner. Working wet over wet, or sanding compound that has not cured, invites shrinkage cracks and a patchy finish.
Keep your knives and hawk clean. Dried flecks dragged through a fresh coat leave tramlines that only show up once you sand, and that is time you should not be spending.
Choosing Your Jointing Compound
The compound you pick affects both speed and durability:
- Setting-type compound. Cures by chemical reaction, sets hard, shrinks very little, and lets you recoat the same day. Ideal for bedding and for butt joints that need strength. The trade-off is that it is harder to sand.
- Air-drying ready-mixed compound. Easier to sand and finish, which suits the final coat, but it dries by evaporation, so cold or humid conditions stretch drying times.
Many finishers run both: a setting compound for bedding and filling, then a lightweight ready-mixed compound for the final feathered coat. Whatever you choose, confirm the product conforms to BS EN 13963, the standard for jointing materials for gypsum plasterboards, and check the two are compatible.
Crack Prevention in Plasterboard Joints
Stopping cracks starts well before the first coat. Get the fundamentals right and the joint holds.
Fix and gap correctly
- Screw boards tight, with heads dimpled just below the paper without breaking it.
- Leave the small board gap where the manufacturer specifies it, so compound keys into the joint instead of bridging a hard seam.
- Reinforce every flat joint with tape. A compound-only joint will crack.
Control the environment
- Plaster and compound do not cure properly in cold, damp, or unventilated spaces. Keep reasonable temperature and airflow while joints dry.
- Never force-dry with direct heat. Rapid surface shrinkage cracks the finish.
Respect movement
- Where dry lining meets a different material, abuts a structural element, or spans a known movement line, use a proprietary movement joint or sealant-filled joint instead of a rigid taped seam.
- Detail long partition runs with movement joints in line with BS 8000-8:2023, the current code of practice for the design and installation of dry lining systems, which superseded the withdrawn BS 8212.
Let the building settle. New timber frames shrink as they dry. Jointing over a frame still giving up moisture invites cracks no matter how good your technique is.
Sanding Safely and Final Inspection
Sanding finished joints produces gypsum dust, and the Control of Substances Hazardous to Health Regulations 2002 (COSHH) require you to control exposure rather than tolerate it. Work through the controls in the right order.
Control the Dust at Source First
- Reduce the need to sand. Good feathering and tapered edges cut down how much abrading you have to do.
- Use on-tool extraction as the primary control. A sander fitted to an H, M, or L class extraction unit removes most of the dust at source. HSE notes that where effective on-tool extraction is used, the lower levels and lower toxicity of gypsum dust mean respiratory protection is often not required.
Respiratory Protection Where Needed
Where extraction is not used or not adequate, wear suitable respiratory protective equipment (RPE):
- An FFP3 disposable mask or a P3 half mask as a minimum, giving the assigned protection factor needed for construction dust.
- Powered RPE, such as a TH2 hood, for longer sessions where a tight mask becomes uncomfortable.
- Tight-fitting masks must be face-fit tested and worn against a clean-shaven seal to work as intended.
Inspect Under a Raking Light
Once dry, sand lightly to knock back ridges, then inspect under a bright light held close to the wall at a shallow angle. A raking light is the most reliable way to catch proud joints, hollows, and feather edges that have not blended. Anything you can see now, the client will see later, so put it right before you move on.
Strong plasterboard joints come from good preparation, careful finishing, and safe working habits. Explore TradeFox to build practical skills through interactive training and improve your confidence before taking those techniques onto site.
Key Takeaways
Sound plasterboard joints come down to four things: fix the boards tight, reinforce every seam with tape, feather patiently across several thin coats, and detail for movement. Match the compound to the task, let each coat cure, control dust at source, and inspect under a raking light. Nail those fundamentals and the surface will hold up long after the scaffold is gone.