

A stair stringer is the inclined structural member that carries the treads and risers and passes the load of the whole flight down to the floor. Get the setting out right and everything else follows. Get the rise, going or pitch wrong and you scrap a length of timber, or worse, you build a staircase that fails building control. This guide is for carpenters and joiners who cut their own strings, and for apprentices moving toward that work. It covers the three numbers that govern every string, the UK stair regulations that fix their limits, and the marking and cutting mistakes that ruin an otherwise sound job.
One quick note on terms before we start. A “stringer” and a “string” are the same thing. You will hear both on site and both are used below.
Before any pencil touches timber, three dimensions have to be settled: the rise, the going and the resulting pitch. Every cut on the string is derived from these. Miss them at the setting out stage and no amount of careful sawing will save the flight.
What is rise, going and pitch on a staircase?
Rise, going and pitch are the three dimensions that fix the shape and steepness of a stair. They are locked together, so once you set any two, the third is decided.
- Rise: The vertical height from the top of one tread to the top of the next.
- Going: The horizontal depth of a tread measured nosing to nosing, less any overlap with the tread above. This is not the same as the physical width of the tread board.
- Pitch: The angle between the pitch line (the notional line linking the nosings) and the horizontal.
For a private domestic stair in England, Approved Document K sets a maximum rise of 220mm, a minimum going of 220mm and a maximum pitch of 42 degrees. Every step in a single flight must share the same rise and going. That last point matters more than any other on the string, because the steps are marked out in one continuous sequence, and a single mismeasured step throws every step above it.
The rise and going ranges you can actually use
Part K gives ranges, not fixed figures. For a private staircase serving one dwelling:
- Rise: Between 150mm and 220mm.
- Going: Between 220mm and 300mm.
- Pitch: 42 degrees maximum.
You may pair any rise in that range with any going in that range (paragraph 1.3 of Approved Document K). These are the England figures. Wales works to its own earlier edition of Part K, and Scotland to the Building Standards Technical Handbook, so confirm which document applies before you set out. Getting the jurisdiction wrong is one of the quieter ways to build a non-compliant stair.
The 2R+G comfort check
Twice the rise plus the going should fall between 550mm and 700mm. This is the quick check every stair joiner runs before committing to a string.
It is worth being precise about its status. The 2R+G figure is described in Table 1.1 of Approved Document K as the normal relationship between the two dimensions, not as a hard limit. Treat it as a comfort check, not a pass or fail. A flight can sit inside the rise and going ranges yet fall outside the 2R+G band at the extremes, so use it to sense-check that the stair will feel right underfoot.
In practice, a rise of around 170mm to 190mm with a going of 240mm to 260mm makes a comfortable domestic staircase and puts 2R+G near the middle of the band. Aim there when space allows, rather than crowding the 220mm rise limit.
How to calculate rise and going before marking the string
Work from the total rise, then divide it into equal steps, then check the pitch. Here is the sequence in order:
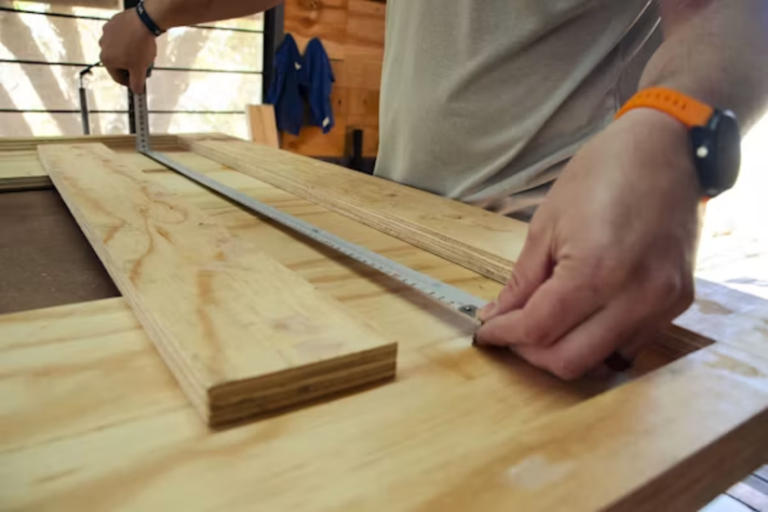
- Measure the total rise: This is the vertical floor-to-floor height, including the thickness of floor finishes at both the top and bottom. Use a laser level, or a spirit level and tape, from the exact point the staircase will start.
- Fix the number of risers: Divide the total rise by a target riser height (say 190mm) and round to the nearest whole number.
- Set the exact rise: Divide the total rise by that number of risers. This gives the true rise per step, and it must be equal across the flight.
- Set the going: The going follows from the available run and the number of treads, which is always one fewer than the number of risers.
- Check the pitch: With rise and going known, the pitch is the arctangent of rise divided by going. A 220mm rise with a 250mm going gives roughly 41.3 degrees, just inside the 42 degree cap.
Carry the figures to three decimal places and only round at the very end. A rise rounded early, then multiplied across fourteen steps, drifts by several millimetres over the flight, and that drift lands as a mismatch where the top of the string meets the trimmer.
Marking the stair stringer without introducing error
The string is marked using a framing square with stair gauges set at the rise and going figures, or a purpose-made pitch board and margin template. Both work. What separates a clean string from a scrapped one is discipline in how the line is carried.
- Work from one datum: Mark from a single reference along the top edge and step the square along, nosing to nosing, without lifting off that reference.
- Mark off the previous line, not by eye: Every time the square is repositioned by eye, a fraction of a millimetre creeps in.
- Keep the pencil sharp: Mark to the same edge of the line every time.
- Label each string: On a stair against a wall, the wall string and outer string carry different housings and sometimes different depths. Mark and label each one at the bench.
On a cut string the tread and riser notches are marked to the same gauge. On a closed string the housings are routed to a jig, but the setting out logic is identical.
The cutting errors that ruin a stair stringer
Most ruined strings fail for a handful of repeatable reasons. Knowing them is how you avoid them.
Forgetting the first tread thickness
The most common way a uniform rise gets broken by accident is failing to allow for the thickness of the first tread when marking the bottom rise. Once the treads are fitted, the bottom step ends up one tread thickness taller than the rest, which breaks the equal-rise requirement instantly. Drop the bottom plumb cut by the tread thickness, or raise the top by it, depending on how the flight lands. Work out which before you cut.
Overcutting the internal corners
A circular saw blade is round, so following the line on the face leaves the cut short on the back, and pushing on to finish it overshoots on the face. Stop the saw short of the corner on both cuts and finish the notch with a handsaw. An overcut corner is a stress point that weakens the string and shows on the exposed face.
Ignoring headroom while chasing a legal pitch
A minimum clear headroom of 2m is required, reducing to 1.9m over the half width and 1.8m at the side only on a loft stair serving one habitable room. A string cut at a lawful 42 degrees can still produce a flight where the head of the opening fouls the ceiling. Check headroom against the trimmer position at setting out, not after the string is cut.
Setting out open risers without the sphere and overlap rules
Open-riser stairs in a dwelling carry two constraints that directly affect how you set out the gap between treads:
- The 100mm sphere: No opening may allow a 100mm diameter sphere to pass through (paragraph 1.9b).
- The 16mm overlap: Treads must overlap by at least 16mm (paragraph 1.9a).
Both feed back into the rise you can run, so design them in before cutting, not after.
Guarding: get the dwelling figure right
For a single dwelling, guarding is required wherever there is a drop of more than 600mm (paragraph 1.41). The height is 900mm for stairs, landings, ramps and internal floor edges, and 1100mm only for external balconies and roof edges (Diagram 3.1).
Be careful with the common site shorthand of “900 on stairs, 1100 on landings.” That pairing is the figure for buildings other than dwellings. For a private house, internal landings are 900mm, so do not carry the commercial number across without checking which building type you are working on.
Accurate stair setting out comes with practice, from calculating rise and going to marking and cutting the string correctly. TradeFox helps carpenters and apprentices develop practical skills through guided simulations built around real trade work.
Cut once, cut right
The stringer is where stair geometry stops being theory and becomes timber. Settle the rise, the going and the pitch against the correct edition of Part K for your area, run the 2R+G check, and confirm headroom before a single notch is marked. Mark from one datum, allow for the first tread thickness, and finish your internal corners by hand. Do that and the flight fits first time.
For the binding figures, always work from the current regulations rather than memory. Bookmark the official sources below and check them on any job that strays from the standard range.