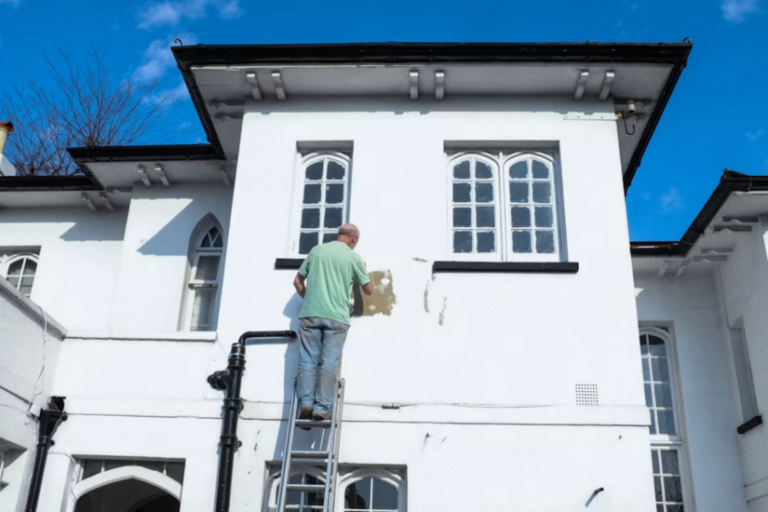
Skimming looks deceptively simple from the outside. A trowel, a bucket of finish plaster, and a couple of hours later the wall reads flat and ready for paint. The reality on site is different.
A skim coat is a 2 to 3 mm finish layer designed to do one specific thing: provide a smooth, paint-ready surface over a sound, properly prepared background. Push it beyond that brief and it fails, often within months.
This guide is written for plasterers, dryliners, and apprentices working toward their CSCS card. It sets out where a thin finish is the correct specification, where it is not, and what current UK standards and HSE regulations require before the first trowel goes near the wall.
What a Skim Coat Actually Is
A skim coat is a thin finishing plaster, typically multi-finish or board finish gypsum, applied in two passes to a combined depth of around 2 to 3 mm. It is not a levelling product. It is not a structural repair. It is the final wearing surface that takes decoration.
BS EN 13914-2:2016, the current British Standard covering the design, preparation, and application of internal plastering, classifies finishing coats separately from undercoats and bonding coats for good reason. Each layer in a plaster system has a defined role.
The keyword here is finir. A skim coat finishes work that has already been brought to the correct plane and suction profile. If the substrate is not ready, no amount of trowel skill will rescue the result.
When a Skim Coat Is the Right Specification
There are four scenarios where skimming is the correct call.
Over freshly set plasterboard
New tapered-edge or square-edge boards fixed in line and true are the textbook background for a thin finish. The board face provides uniform suction, the joints can be scrimmed, and a two-coat skim brings the whole wall to a paintable finish. This is standard new-build and refurbishment practice across the UK.
Over sound, well-keyed undercoat plaster
Where a backing coat of bonding, browning, or hardwall has been ruled off flat and scratched to provide a mechanical key, a finish coat is the correct second-stage application. The undercoat carries the levelling responsibility; the skim carries the finish.
Over previously decorated walls that have been properly prepared
This means walls that are:
- Sound and free from blown or hollow areas
- Dust-free and clean
- Treated with an appropriate bonding primer (more on product choice below)
- Free from active damp or salt contamination
Flaking paint, blown plaster, or contaminated backgrounds will not hold a skim coat regardless of preparation effort.
Over freshly tacked dot-and-dab boards on masonry
Provided the adhesive has cured and the boards are firm to the touch, this is a routine application.
When a Skim Coat Will Not Save the Surface
This is where most disputes between plasterers and clients originate. Apprentices need to develop the judgement to push back on unrealistic specifications before the work starts, not after it has failed.
Walls that are out of plumb or significantly uneven
A 2 to 3 mm finish cannot correct deviations beyond what that thickness can absorb. Trying to build out hollows with finish plaster results in cracking, slumping, and an inconsistent dry. The correct call is a full re-render with bonding or hardwall first, ruled to plane, then skimmed.
Blown or hollow-sounding plaster
Tap the wall. If sections sound hollow, the existing plaster has lost its bond with the masonry. Skimming over blown plaster is a guaranteed failure. The affected areas must be hacked off back to a sound edge and made good with an appropriate undercoat before any finish coat is considered.
Damp-affected walls
This is non-negotiable. Applying a skim coat over a wall with active rising damp, penetrating damp, or salt contamination locks moisture into the structure and produces:
- Efflorescence salts pushing through the finish
- Blown plaster within weeks or months
- Decorative failure as paint blisters and lifts
- Ongoing structural deterioration behind the finish
The damp source must be diagnosed and remediated, often by a chartered surveyor or a specialist damp contractor, before any plastering work begins. Salt-contaminated backgrounds require a specialist renovating plaster system, not a standard finish.
Painted walls in poor condition
Gloss paint, distemper, limewash, and any flaking or unsound coatings are not suitable backgrounds for skimming. Distemper in particular is a known cause of skim failure: it reactivates with moisture from the plaster and the whole finish lets go from the wall. These coatings must be stripped or the surface fully isolated before a thin finish is viable.
Surfaces with the wrong suction profile
Highly absorbent backgrounds will pull water out of the skim too fast, causing the plaster to grab and crack. Non-absorbent surfaces will not bond. Both require correction with a suitable primer matched to the background.
A note on primer choice: PVA solutions are still common on site, but current best practice for skimming over painted or low-suction backgrounds favours proprietary acrylic primers containing a key-aggregate, such as Thistle Bond-it or equivalent products from other manufacturers. PVA can re-emulsify under fresh plaster moisture, which causes the same failure mode as distemper. Always check the manufacturer’s technical data sheet against the specific background.
Preparation: The Step That Decides the Outcome
BS EN 13914-2:2016 places considerable weight on background assessment and preparation. The standard is clear that responsibility for selecting the correct system sits with the specifier and the applicator.
Before opening a bag of finish plaster, work through the following checks:
- Inspect the background for soundness, plane, and contamination
- Check moisture content with a meter where damp is suspected
- Test suction with a small water spray: if it absorbs immediately, dampen down or seal; if water beads, use a bonding primer
- Mask off and protect adjacent finishes, sockets, and floors
- Confirm ambient conditions sit within the manufacturer's range, typically 5°C to 30°C with no risk of frost during set
Skipping any of these steps is where snagging and remedial visits originate. The cost of returning to a job to strip and re-do a failed skim coat will dwarf the time spent on proper preparation.
TradeFox helps you build the same habits in a steady, practical way, with simple simulations that let you learn at your own pace on any device. Start with the basics, get the prep right, and carry that same standard into every job.
Health and Safety: What UK Law Requires
Plastering is not a low-hazard trade, and apprentices entering the industry need to understand the regulatory framework from day one. Several pieces of legislation apply directly to skimming work.
COSHH and Workplace Exposure Limits
The Control of Substances Hazardous to Health Regulations 2002 (COSHH) require employers, including the self-employed, to assess and control exposure to hazardous substances. The principal concerns for plasterers are gypsum dust during mixing and sanding, and respirable crystalline silica (RCS) where backgrounds contain cement-based products.
Workplace Exposure Limits are published in HSE document EH40/2005, which is legally binding under COSHH:
- Gypsum dust: 10 mg/m³ inhalable and 4 mg/m³ respirable, both as 8-hour time-weighted averages
- Respirable crystalline silica (RCS): 0.1 mg/m³ as an 8-hour time-weighted average
- RCS classification: Group 1 carcinogen, identified by HSE as the second greatest health risk to construction workers after asbestos
Even where exposure sits below these limits, COSHH requires control to as low as reasonably practicable (ALARP) for any substance classified as a carcinogen, mutagen, or asthmagen.
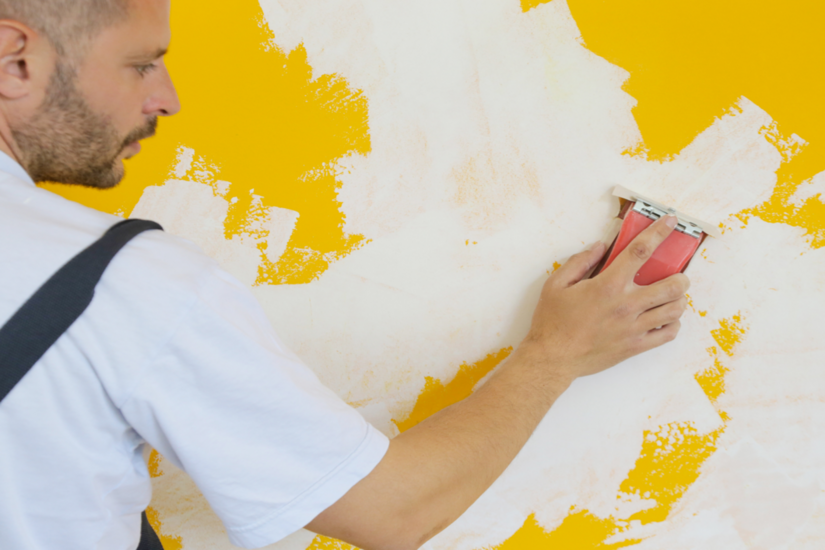
Dust Control on Site
The HSE expects engineering controls to come before reliance on RPE. For a skim coat workflow, that means:
- On-tool extraction when sanding finishes
- For gypsum-only sanding: L, M, or H-class extraction units are accepted under HSE guidance, because gypsum is classed as a lower-toxicity dust
- For any work generating RCS (cutting cement-based products, masonry preparation): M-class is the minimum, and H-class is preferred
- Water suppression where practical, particularly during cement-based undercoat preparation
- Industrial vacuum (not a domestic vacuum) for clean-down; never use compressed air or dry sweeping for silica-containing dust
LEV equipment must be thoroughly examined and tested at least once every 14 months under COSHH Regulation 9.
Respiratory Protective Equipment
Where dust cannot be controlled fully at source, FFP3-rated RPE is the standard recommendation. RPE rules to follow:
- Tight-fitting masks must be face-fit tested, with records kept
- A clean-shaven seal is required for tight-fitting masks to function
- Storage, maintenance, and replacement schedules must be documented
- HSE document HSG53 sets out the practical requirements
RPE is the last line of defence, not the first. Relying on it alone is not acceptable under COSHH.
Règlement de 2015 sur la construction (conception et gestion)
CDM 2015 places statutory duties on contractors and workers on every construction project, including refurbishment plastering. The key duties for a plasterer or sub-contractor include:
- Planning, managing, and monitoring the work to make sure it is carried out without risk to health and safety
- Cooperating with the principal contractor and other duty holders on site
- Following the construction phase plan and any relevant Risk Assessment and Method Statement (RAMS)
- Reporting hazards and incidents through the correct channels
Even on small domestic jobs where formal CDM documentation is lighter, the underlying duties still apply.
Manual Handling
CDM 2015 places statutory duties on contractors and workers on every construction project, including refurbishment plastering. The key duties for a plasterer or sub-contractor include:
- Mechanical mixing rather than hand-mixing where volume justifies it
- Suitable working platforms (tower scaffolds, hop-ups) at the correct height
- Rotation of tasks across the team
- Two-person lifts for full bags where working space allows
Specifying the Correct Work
The skill that separates a competent plasterer from a journeyman is knowing when to walk away from a job that has been priced as a skim coat but actually needs a full re-plaster. Clients and main contractors will push for the cheaper option.
The plasterer who agrees to skim a wall that needs proper preparation owns the failure when it appears six months later. Document the substrate condition, photograph it, and put any concerns in writing before you accept the work.
A skim coat is a finishing operation. When the background is right, it produces a flawless paint-ready surface in a fraction of the time of a full plaster. When the background is wrong, no thin finish will save the wall, and the only honest answer is to specify the work the surface actually requires.