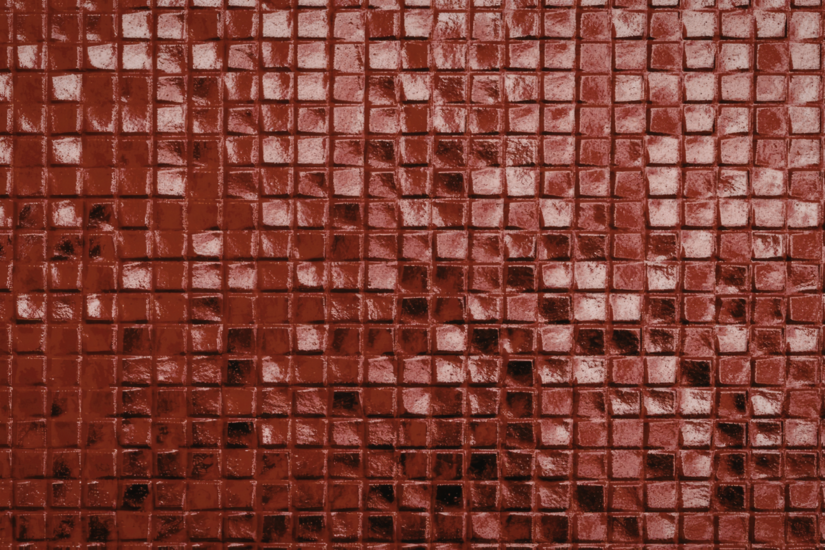
Mosaic tiles are small-format tiles supplied in pre-arranged sheets, and they punish poor workmanship more visibly than any other tile type. The detail below covers what separates a competent fixer from one whose work fails inspection.
The sections that follow walk through sheet construction, alignment discipline, the mesh problems that cause de-bonding, grouting technique that minimises waste and surface contamination, and the safety obligations every tradesperson on a UK site must meet.
What Mosaic Tiles Actually Are
A mosaic tile is any tile with a facial dimension typically below 50mm, supplied as a pre-arranged sheet on a backing for ease of installation. The individual pieces (called tesserae) can be made from:
- Glazed or unglazed ceramic
- Porcelain
- Glass
- Porcelain Glass Natural stone (marble, travertine, slate, basalt)
- Metal or metal-coated composites
- Mother-of-pearl, shell, or other decorative materials
Mosaics fall within the scope of BS 5385-1:2018 for internal wall installations and BS 5385-3:2024 for floor installations. The 2024 revision of Part 3 superseded BS 5385-3:2014 and now also covers natural stone, terrazzo, and internal agglomerated stone flooring within a single document. Certain materials (such as glass and metal mosaics) sit partially outside the standard’s direct coverage and require manufacturer-specific guidance.
Sheet Backing Types
The backing dictates almost everything about how the sheet behaves on site.
- Mesh-backed (rear mesh) – fibreglass or polymer mesh bonded to the back of each tessera. Most common construction. Adhesive is applied to the substrate, and the sheet is pressed in face-up.
- Paper-faced (front paper) – kraft paper bonded to the face. The sheet is laid face-down into the adhesive and the paper is wetted off after the adhesive has set. Common with traditional Italian glass and stone mosaics.
- Dot-mounted – small adhesive dots between tesserae hold the sheet together. Less common in UK supply.
- Film-faced – clear or semi-clear film on the face, removed after fixing. Used for premium glass mosaics.
Each backing creates different alignment, adhesive, and grouting challenges, addressed in the relevant sections below.
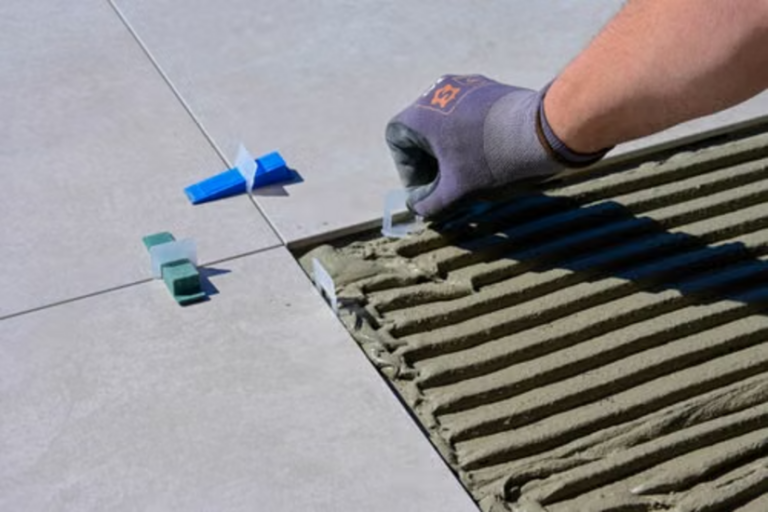
Sheet Alignment: Where Most Installations Go Wrong
Mosaic alignment is unforgiving. A 2mm error on a single 600mm tile is barely visible. The same 2mm error across a sheet of 30mm mosaics creates a wave that runs through the whole installation.
Dry-lay at least three full sheets in each direction to confirm the joint pattern matches between sheets.
Setting Out
Setting out is the single most important phase of any mosaic job. Before any adhesive is mixed, the principal axes need to be established and the sheet pattern fully understood across the whole area to be tiled. The bullets below cover the discipline:
- Snap chalk lines or use a laser level to establish the principal axes
- Check the sheet-to-sheet joint matches the tile-to-tile joint within the sheet (commonly 2mm, but verify with a steel rule)
- Identify cut lines at the perimeter so cuts fall in the least visible position
- For feature walls, set the principal sight line first and work cuts to the corners
Sheet-to-Sheet Joints
The most common alignment failure is a perimeter joint that is wider or narrower than the joints within the sheet. Manufacturers vary in how tightly they hold this tolerance. Always dry-lay before quoting a job, particularly if the customer has supplied tiles from a budget source.
Rectified mosaic sheets generally hold tighter tolerances. Non-rectified sheets, hand-cut natural stone mosaics in particular, can vary by ±1mm sheet-to-sheet, which compounds across a wall.
Pressing and Bedding
Mesh-backed sheets must be pressed firmly and evenly into the adhesive bed. A grouting float or specialist mosaic beating block, used flat across the sheet face, distributes pressure without driving individual tesserae below the surface plane. Uneven pressure produces lippage even when the sheet appears flat to the eye.
For paper-faced sheets, alignment is checked through the paper while the adhesive is still workable, then locked in by light tamping. The paper is removed only after the adhesive has gone off.
Mesh Issues That Cause De-Bonding
This is the section where reputational damage gets done. Mesh-related failures often only appear weeks or months after handover, when the customer is well past the snagging period and you are well past wanting the job back.
The Coverage Problem
BS 5385-1:2018 requires solid bedding for tiles with a facial area under 0.1m² where the tile weight per square metre exceeds 70% of the substrate’s load capacity. In wet areas, full adhesive coverage is required regardless of tile size.
Mesh backing creates a barrier between the adhesive and the tile back. If the mesh is heavy, dense, or coated with excessive bonding agent, adhesive cannot transfer properly to the tessera. The result is a sheet that appears bonded but is actually held only by adhesion to the mesh itself, which can later separate from the tile.
Mesh Quality Variation
Cheap imported mosaic sheets vary enormously in mesh quality. As a working rule of thumb, look out for:
- Excessive adhesive on the mesh face that prevents transfer
- Mesh covering an excessive proportion of the tile back
- Mesh that is glued only at the corners and lifts in the middle of each tessera
- Backing materials that are not water-resistant in wet area applications
The Tile Association (TTA) and adhesive manufacturers including BAL, Mapei, and Ardex all flag the same risk: tile manufacturers vary widely in mesh specification, and the installer carries the liability for the result.
Sample Testing as Good Practice
Before starting any large mosaic job, particularly with unfamiliar product, take a sample sheet and test it. This is not a formal standardised test, but it is an established trade practice. Bond a section to a piece of tile backer board with the specified adhesive. Allow to cure for the manufacturer’s stated time. Then attempt to peel a tessera off. If the tile separates from the mesh while the mesh remains stuck to the adhesive, you have a problem that no installation technique can solve. Refuse the product or get the specification changed in writing.
Wet Area Installations
In showers, wet rooms, and around baths, mesh failures are catastrophic. Water tracks behind the tessera through the mesh layer and undermines the bond progressively. Wet area work also introduces additional regulatory layers that do not apply to dry rooms.
For wet area mosaic work:
- Use only mosaics with backings rated for wet area use by the manufacturer
- Apply a tanking system compliant with BS 8000-11 to the substrate
- Use a flexible adhesive appropriate to the substrate movement and water exposure (commonly C2TE-S1, with C2TE-S2 specified where substrate movement is significant such as timber decks or underfloor heating)
- Verify full bedding by lifting a sheet during installation if there is any doubt
- For showers, consider extending tanking up to ceiling level rather than stopping at typical splash height
- Check that any pipework penetrations are sleeved and sealed before tiling commences
The combination of tanking, flexible adhesive, and waterproof grout is the system that delivers long-term performance. Skipping any one of these components is the most common cause of wet area mosaic failure.
Mosaic Adhesive Selection
The adhesive choice depends on the tessera material, the sheet backing, and the substrate.
Standard Specifications
- C2TE adhesive (improved cementitious, with reduced slip and extended open time) is the typical baseline for mosaic work
- C2TE-S1 for areas with limited movement
- C2TE-S2 highly deformable, for substrates with movement such as timber or heated floors
- White adhesive for glass, translucent, and light natural stone mosaics. Grey adhesive shows through and discolours the finish
Notched Trowel Selection
Use a fine notched trowel (typically 4mm to 6mm) for mosaic work. Larger notches leave ridges that telegraph through the sheet face. Combing direction matters less than coverage, but consistent direction helps later inspection.
Open Time
Mosaic work eats open time. Each sheet takes longer to bed and align than a single large tile. In warm conditions, the adhesive may skin before the sheet is properly pressed. Always work to the manufacturer’s stated open time and skin time, and reduce the area of adhesive applied at any one moment if conditions are warm or windy.
Grouting Without Mess
Grouting mosaic tiles produces more waste, more haze, and more clean-up than any other tile type. The joint network is dense, the surface area is high, and many mosaic finishes (glass, polished stone, metallic) show grout residue badly.
Grout Selection
- Use only grout compliant with BS EN 13888 (CG2 minimum for normal use)
- Flexible CG2 grout for floors, wet areas, and substrates with movement
- Epoxy grout (R2T classification) for high-stain areas, food preparation surfaces, and chemically aggressive environments
- Avoid sanded grout on glass, polished stone, or metal mosaics, as the sand particles will scratch the surface during application
- Match grout colour to tessera colour to mask any minor alignment issues
Joint Width
BS 5385-1:2018 sets minimum joint widths by tile facial area. For mosaic tiles, the joint within the sheet is set by the manufacturer (typically 2mm) and cannot be altered. The sheet-to-sheet joint should match the within-sheet joint as closely as possible.
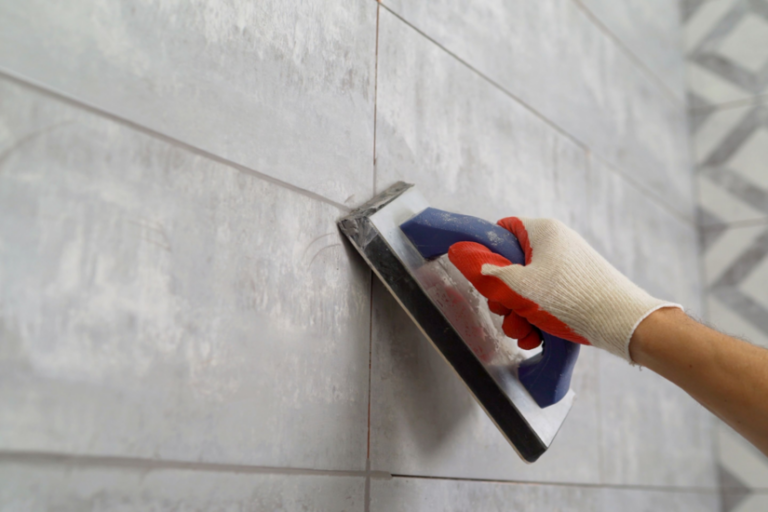
Application Technique
- Mix grout to the manufacturer's specified water ratio. Over-watering reduces strength and increases shrinkage cracking
- Apply with a soft rubber float held at 45 degrees, working diagonally across the joints
- Force grout into joints with two or three passes from different angles to ensure full filling
- Remove excess from the surface promptly using the float held at 90 degrees
Cleaning Off
This is where mosaic grouting separates skilled fixers from improvers.
- Wait for the grout to firm but not fully cure (typically 15 to 30 minutes, depending on conditions)
- Use a dense grout sponge, well wrung out, not dripping. A wet sponge dilutes joint grout and washes it out
- Work in single passes with a clean face of the sponge each time, rinsing in two buckets (one rinse, one clean)
- Never use circular motions, which lift grout from the joints
- Do a final haze removal with a dry microfibre cloth once the surface has dried to a film
For glass and metallic mosaics, a grout release agent applied to the face before grouting can prevent staining. Always test on a spare sheet first.
Common Mess Failures
- Letting grout set too hard before sponging (requires acid wash, which damages cementitious grout)
- Sponging too wet, washing grout out of joints
- Working circular motions and creating low spots
- Failing to change rinse water often enough, depositing grey film over the whole surface
UK Safety and Compliance Obligations
This is where many tile fixers, particularly those moving from domestic to commercial sites, get caught out.
Respirable Crystalline Silica (RCS)
Cutting tile and stone mosaics with any power tool generates respirable crystalline silica. Tiles typically contain 30 to 45% crystalline silica content. The HSE Workplace Exposure Limit is 0.1 mg/m³ as an 8-hour time-weighted average, set out in EH40/2005, with RCS now classified as a carcinogen.
Under the Control of Substances Hazardous to Health Regulations 2002 (COSHH), exposure must be reduced as low as reasonably practicable. For tile cutting, this means:
- Wet cutting as the primary control. A wet saw with continuous water feed dramatically reduces airborne dust
- Local exhaust ventilation (LEV) with on-tool extraction where wet cutting is not practical
- Use an M-class vacuum with on-tool extraction. M-class is the HSE-recommended dust class for silica and other medium-hazard construction dusts on UK sites. H-class units exist but are intended for higher-hazard substances such as asbestos. A standard commercial or domestic vacuum is not adequate, regardless of filter changes
- Respiratory protective equipment as a final control, not a substitute for engineering controls. FFP3 disposable masks for short-duration work, half-mask with P3 filters for prolonged exposure
- Face fit testing for any tight-fitting RPE, with records kept
Eye Protection
Eye protection rated to BS EN 166 is required during all cutting operations, drilling, and grout sponging. Silica fragments, water mist, and grout splashes all pose eye injury risk. Wraparound safety glasses or goggles are the practical baseline.
Other Site Obligations
- CDM 2015 applies to most construction work. On notifiable projects, the principal contractor must include tiling activities in the construction phase plan.
- CSCS card required for site access on most commercial jobs.
- CIS registration with HMRC is required for most subcontractors providing tiling services to construction businesses.
- Manual handling assessments for boxes of stone or porcelain mosaics, which are heavier than they look.
- Slip hazards during wet cutting and grout sponging, particularly on stairs and around scaffolds.
Workmanship Standard
BS 5385-1:2018 Clause 7.1.3 introduced an explicit workmanship requirement. Tiling must be carried out by a skilled operative, trained to a level of competence certified by a recognised authoritative body such as The Tile Association. NVQ Level 2 in Wall and Floor Tiling (or recognised equivalent) is the baseline qualification. The TTA Skills Card is the most widely accepted demonstration of ongoing competence in the UK trade.
Practical Guidance for Tradespeople
A few habits separate competent mosaic fixers from those who create call-backs.
Always sample-test unfamiliar product. Mesh quality varies enormously between manufacturers. Five minutes with a piece of backer board and a sample sheet can save a full strip-out later.
Set out before you mix adhesive. Mosaic alignment errors compound. Once the adhesive is on the wall, your options narrow dramatically.
Choose adhesive colour deliberately. White under glass and pale stone, grey under dark ceramic. Mistakes here can ruin a finish that is otherwise technically perfect.
Plan grout clean-up time into the day. Mosaic grouting takes longer to clean than large format. Do not start a wall you cannot finish cleaning before the grout sets.
Document the substrate. Photograph the substrate before tanking and before tiling. If a customer later challenges a failure, your evidence trail starts here.
Refuse jobs where the substrate is wrong. BS 5385-1:2018 excludes plywood as a direct tiling substrate. If the previous trade has left plywood, get tile backer board specified and added to the variation. TradeFox can support learners and working tradespeople with easy-to-follow online training in tiling, plumbing, electrics, safe isolation, and other trade skills through practical simulations that can be revisited at your own pace.
Closing Thoughts
Mosaic tiles look simple but punish poor workmanship more visibly than any other tile format. The decision to take on a mosaic job rests on substrate suitability, an honest assessment of mesh quality, the right adhesive and grout selection under BS EN 12004 and BS EN 13888, and current knowledge of BS 5385 parts 1 and 3, COSHH 2002, and HSE silica controls.
For tradespeople, the discipline lies in setting out properly, sample-testing unfamiliar product, and planning the clean-up time as carefully as the installation itself. Get those three habits right and the rest of the work tends to follow.