Achieving precision in masonry is a fundamental requirement for any professional tradesperson or dedicated DIY enthusiast. Whether you are constructing a complex archway, finishing a retaining wall, or simply ensuring a perfect bond around a tricky corner, knowing how to cut bricks cleanly is an essential skill.
Poorly cut materials lead to structural weaknesses, wasted supplies, and an unprofessional finish. This comprehensive guide covers the essential tools, rigorous safety protocols, and correct techniques required to master the art of modifying masonry units on site safely.
UK Safety Regulations: Prioritising Health and Compliance
Before handling any equipment or materials, understanding and applying UK health and safety regulations is completely non-negotiable. The Health and Safety Executive (HSE) has strict guidelines regarding construction dust, specifically Respirable Crystalline Silica (RCS).
Silica dust is generated when working with brick, concrete, and stone. Prolonged exposure can lead to severe respiratory diseases, including silicosis and chronic obstructive pulmonary disease (COPD). Under the Control of Substances Hazardous to Health (COSHH) Regulations 2002, employers and tradesmen must prevent or adequately control exposure to RCS. When cutting bricks, dust suppression is always the primary control method. Wet cutting systems or on-tool extraction methods must be employed whenever feasible.
Furthermore, adequate Personal Protective Equipment (PPE) is a strict legal requirement. A compliant face-fitted FFP3 dust mask must be worn during any activity that generates airborne particles. Alongside respiratory protection, high-impact safety glasses are required to shield your eyes from flying debris and shards. Heavy-duty gloves, steel-toed boots, and appropriate hearing protection are also mandatory on any active building site.
Safety must always dictate your workflow, ensuring long-term health and career longevity. You must also be mindful of Hand-Arm Vibration Syndrome (HAVS). Prolonged use of heavy club hammers and petrol saws can cause irreversible nerve damage, so taking regular, scheduled breaks is absolutely vital.
Essential Tools for Professional Brickwork

Selecting the correct implement is the first step in learning how to cut bricks cleanly. Tradesmen must carry a variety of manual and electrical options to adapt to different materials, ranging from soft handmade clay to highly dense engineering blocks.
Manual Hand Tools
For many traditional masonry tasks, manual tools offer superior control and generate significantly less hazardous dust.
- Brick Chisel : Also known as a bolster, this features a wide blade specifically designed for splitting masonry units evenly across their width.
- Cold Chisel : A narrower instrument used for chipping away small protrusions or creating precise indentations where a wider blade cannot reach.
- Club Hammer : A heavy, short-handled hammer used in conjunction with chisels. A standard claw hammer lacks the necessary mass and striking face for heavy masonry work and should never be used for this task.
- Marking Tools : A robust builder’s pencil, chalk, or a specialized line pin is needed to accurately mark the intended dimensions.
Electrical Equipment
When volume and density demand greater force, modern equipment becomes necessary. Please note that under UK law (PUWER), anyone operating an angle grinder or petrol disc cutter must have formal Abrasive Wheels training.
- Angle Grinders : These are highly versatile machines capable of slicing through dense materials rapidly. They must be fitted with a high-quality, continuous rim or segmented diamond masonry blade. For highly dense engineering bricks, continuous rim or specifically formulated diamond blades are strictly required, as standard segmented blades can sometimes chip hard clay.
- Disc Cutters : Petrol-powered or high-voltage electric saws, often referred to as Stihl saws, are utilized for heavy-duty, high-volume operations. These typically feature integrated water attachments for wet cutting.
- Block Splitters : Mechanical guillotines that slice cleanly through pavers and standard clay units without generating any airborne silica.
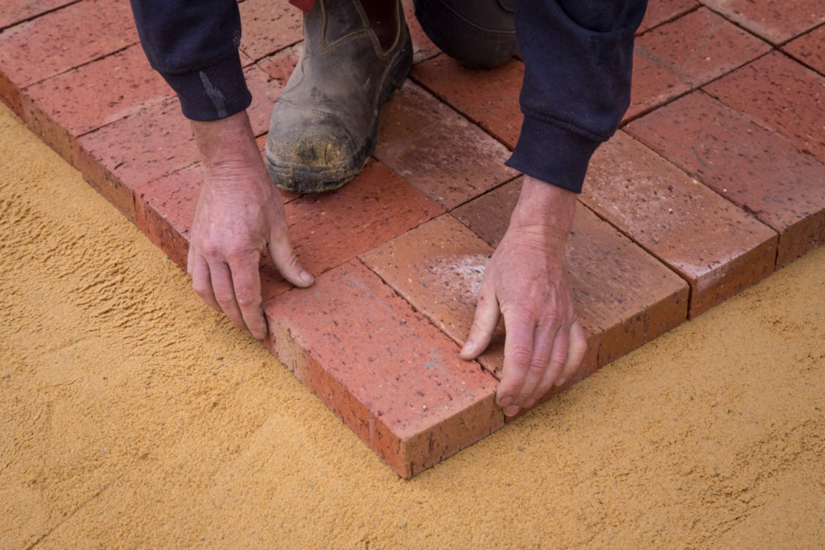
How to Cut Bricks Cleanly Using Hand Tools
Manual methods remain highly relevant on modern construction sites. They are particularly useful for heritage work, small-scale adjustments, and environments where noise or dust generation is strictly limited. Following a methodical process ensures professional results.
Step 1: Measuring and Marking
Precision begins with accurate measurement. Place the single brick on a stable, flat surface. Using a tape measure and a straight edge, determine the exact dimensions required for the space. Draw a straight line completely around the perimeter of the material. This continuous boundary becomes your definitive cut line, guiding every subsequent action.
Step 2: Creating the Guidelines
Do not attempt to split the material with a single, massive blow. Instead, you must weaken the structure along the marked perimeter. Place the edge of your bolster directly onto the line. Tap the handle firmly but gently with your club hammer. Rotate the piece and repeat this process on all four sides. This action creates visible score lines, sometimes called “tinning”, which dictate where the internal fracture will occur.
Step 3: The Final Strike
Once the perimeter is deeply scored, place the masonry unit on a solid substrate, such as a bed of sand or level ground. Position the blade of your chisel directly into the groove on the broad face of the material. Ensure that the bevelled edge of the bolster faces the “waste” side of the brick for maximum precision. Angle the tool slightly towards the side you intend to keep. Deliver a single, forceful, and decisive strike to the handle with your heavy hammer. The material should fracture cleanly along the weakened perimeter.
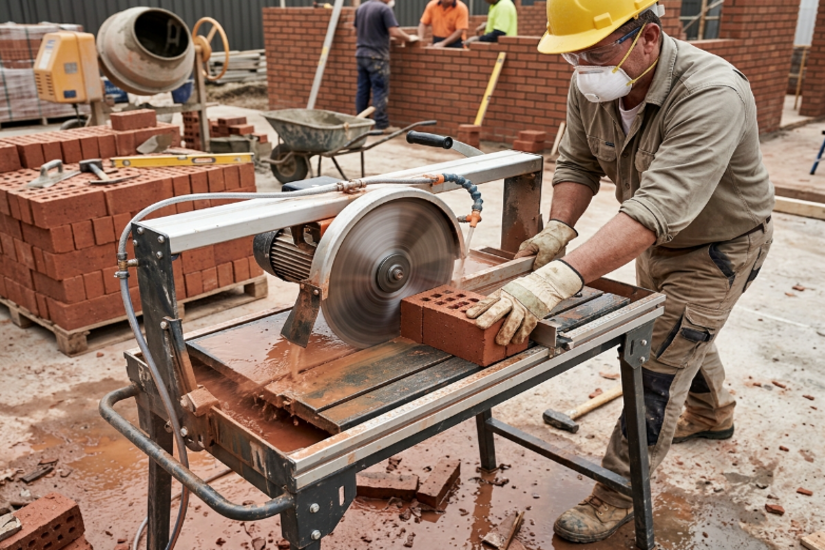
How to Cut Bricks Cleanly Using Power Equipment
When dealing with exceptionally hard engineering bricks or when the project demands hundreds of precise alterations, tradesmen must turn to mechanical power tools. While these machines save time, they introduce significant hazards that require strict management.
Step 1: Preparation and Securing the Workpiece
Unlike manual splitting, mechanical friction generates immense torque. The material must be secured firmly to prevent it from vibrating or becoming a dangerous projectile. Never hold a brick with your foot or hand while operating a disc cutter or angle grinder. This is a highly dangerous practice. Always use a dedicated brick clamp, a masonry vice, or a secure jig. For high-volume cutting, a dedicated masonry bench saw is the safest and most efficient option.
Step 2: Managing Dust and Aligning the Cut
Always prioritize wet cutting. Connect a pressurized water bottle or a mains water feed to your equipment to suppress the silica dust right at the source. Start the machine and allow it to reach its maximum operating revolutions per minute before making contact with the material. Align the spinning disc carefully with your marked lines.
Step 3: Executing the Cut
Gently lower the blade into the surface. Do not force the machine downwards; simply allow the diamond abrasives to grind away the material at their own pace. Maintain a steady, even pressure throughout the motion. If the blade binds or slows down significantly, ease off the pressure to allow the engine to recover. For thicker units, it is always safer to score completely around the perimeter with a shallow pass before plunging deeper to finish the job. This staged approach reduces the risk of the blade warping and kickback.
Common Mistakes to Avoid on Site
Even experienced workers can sometimes develop bad habits. Avoiding these common pitfalls separates true professionals from amateurs.
- Ignoring PPE and Dust Suppression : The most critical mistake is dry cutting without respiratory protection. Silicosis is entirely irreversible. Always use extraction or water suppression, regardless of how small the task appears.
- Using Incorrect Blades : Attempting to slice through hard engineering blocks with a standard abrasive disc will result in excessive heat, shattered blades, and ruined materials. Always match the disc specification to the material density.
- Rushing the Score : When using manual tools, skipping the initial perimeter scoring process almost guarantees an uneven, jagged break. Patience during the preparation phase saves time wasted on discarded materials.
- Forcing the Machine : Applying excessive downward pressure on a mechanical saw causes the blade to wander, resulting in crooked edges and potential kickback. Let the power tool do the heavy lifting.
- Working on Unstable Surfaces : Attempting to split or slice materials balanced on a scaffold board or uneven ground leads to inaccuracy and severe safety risks. Always establish a solid, dedicated cutting station.
To avoid these common site mistakes and build proper cutting techniques safely, TradeFox offers practical, step-by-step training with real-world simulations that help you learn at your own pace and improve accuracy on site.
Conclusion
Understanding how to cut bricks cleanly is a skill built upon patience, the correct application of force, and an unwavering commitment to site safety. By combining traditional hand techniques with modern, properly managed equipment, tradesmen can execute complex architectural details efficiently. Always respect the materials, prioritize dust management to comply with UK health regulations, and maintain your equipment to the highest standards. Mastering these fundamentals ensures your brickwork remains structurally sound, visually flawless, and completely safe to construct.