


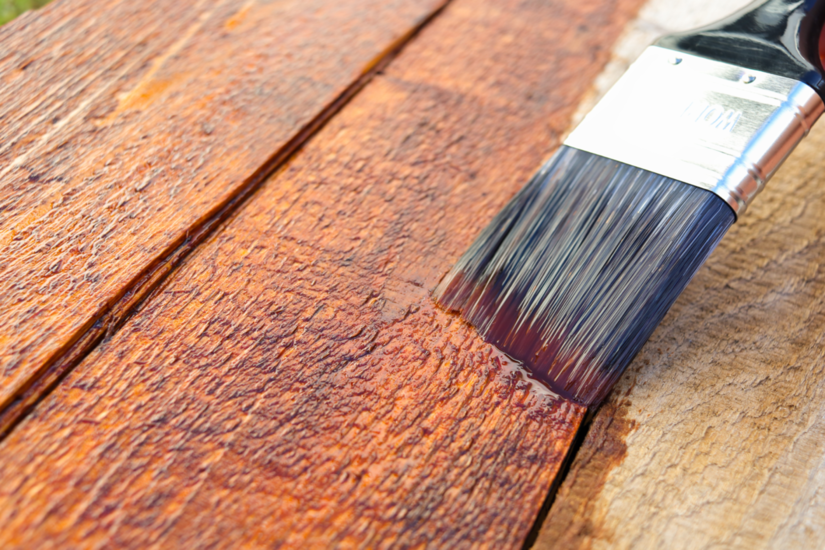
Ask ten decorators why an MDF job came back and nine will point at the edges. The faces are rarely the problem. It is the cut ends that fur up, drink the coating and leave a line of dull, rough sheen down every arris.
Knowing how to paint MDF properly comes down to three controls: sealing the cut edges before any topcoat, choosing a primer that does not swell the fibre, and keeping dust out of the wet film. Manage all three and MDF finishes as well as prepared softwood.
Quick answer: Seal every cut edge with a purpose-made MDF edge sealer or a solvent-based primer, sand back at 180 to 240 grit, prime faces and edges, de-nib, then apply two thin topcoats. Machine and sand only with extraction and FFP3 respiratory protection, because MDF dust is controlled under COSHH.
Why does MDF need different treatment to timber?
MDF is wood fibre bonded with resin and compressed under heat and pressure. That process leaves a dense, closed skin on both faces and a softer, more open core in the middle.
Almost every finishing problem on this material traces back to that structure.
- The faces are relatively non-absorbent. The factory skin is doing useful work, so treat it as an asset.
- The cut edges are open fibre. They behave like a wick, pulling coating into the board instead of holding it on the surface.
- Water swells the fibre. Any water-based product applied to a raw edge stands the fibres up, which is where furring comes from.
No amount of extra topcoat will bury a raised edge. It has to be sealed and cut back first.
Working safely with MDF: the COSHH essentials
This section comes before the finishing detail on purpose. The machining and sanding stages carry the real risk on this material, and the paint stage carries its own.
What are the wood dust exposure limits?
Wood dust, including dust from composite boards such as MDF, is a substance hazardous to health under the Control of Substances Hazardous to Health Regulations 2002.
HSE sets these workplace exposure limits, both as an 8-hour time-weighted average:
- Hardwood dust: 3 mg/m³
- Softwood dust: 5 mg/m³
- Mixtures containing hardwood: 3 mg/m³ applies to every wood dust in the mixture
MDF is typically manufactured from mixed hardwood and softwood fibre, so plan your controls around the lower figure.
Meeting the limit is the floor, not the target. Wood dust is a respiratory sensitiser and hardwood dust is a recognised cause of sino-nasal cancer, so COSHH requires exposure to be reduced as low as is reasonably practicable whatever your monitoring says. Carpenters and joiners are four times more likely than other UK workers to develop asthma.
Controlling the dust at source
- Fit extraction to every machine. Local exhaust ventilation or on-tool extraction on saws, routers and sanders.
- Test the LEV. Under COSHH regulation 9, LEV must be thoroughly examined and tested at least every 14 months by a competent person, with records kept for at least five years. Processes listed in COSHH Schedule 4 require shorter intervals.
- Use a class M vacuum as a minimum. An H-class unit is better for fine sanding dust.
- Never sweep and never use an airline. Both put the finest and most damaging fraction straight back into the air.
Respiratory protection and face fit testing
Where extraction alone will not control the dust, which covers most sanding, routing and cleaning down, you need respiratory protection.
- Minimum assigned protection factor of 20. In practice that means FFP3 or a P3 half mask.
- Face fit testing is required for tight-fitting RPE. It is the employer's responsibility and the employer's cost.
- A tight-fitting mask needs a clean-shaven seal. If someone will not shave, a powered hood or visor system is the answer, not a compromise on the mask.
Fire and explosion: the risk most people miss
Wood dust is a dangerous substance under the Dangerous Substances and Explosive Atmospheres Regulations 2002, not only a health hazard.
HSE puts the minimum explosible concentration for wood flour at 60 g/m³, which is a very dense cloud, and notes that many woodworking fires start inside the extraction system itself. Add solvent-based coatings to the same workspace and you have fuel and ignition sources in one place.
Keep settled dust down, control ignition sources, and store solvent products away from the machining area.
Manual handling, skin and eyes
- MDF is heavy. A full 18mm sheet is a two-person lift or a job for a board trolley. The Manual Handling Operations Regulations 1992 apply.
- Wood dust causes dermatitis. Provide gloves and washing facilities, and check skin condition.
- Wear eye protection when machining, sanding and spraying.
Health surveillance
Where the criteria in COSHH regulation 11 are met, health surveillance is required. For workers regularly exposed to wood dust that usually means respiratory and skin checks, with records kept.
Choosing the right MDF board
Board selection decides half the finish quality. Specify it when you quote, not at the merchant’s counter.
| Board type | Intended use | Key point |
|---|---|---|
| Standard MDF | Dry interior joinery and decorative work | Specified under BS EN 622-5 |
| Moisture-resistant MDF | Humid interiors such as bathrooms and utilities | Not waterproof and not an external board |
| Fire-retardant MDF | Where a reaction-to-fire classification is specified | Confirm your coating does not affect the declared performance |
| Pre-primed MDF | Skirting, architrave and door linings | The cut ends are still raw and still need sealing |
Two points worth knowing.
The green and red dyes used for moisture-resistant and fire-retardant boards are a manufacturer convention, not a requirement of the standard. Read the label and the declaration of performance rather than trusting colour.
On fire-rated work, check with the board manufacturer that your coating system does not affect the declared reaction-to-fire classification under BS EN 13501-1. A heavy build of an unapproved coating is a compliance problem, not a finishing preference.
Let boards acclimatise in the installation environment before you machine or finish them.
Cutting and machining for a paintable edge
The quality of the cut sets the ceiling on the finish.
- Use sharp tungsten carbide tooling with a high tooth count. Every bit of fuzz you avoid at the saw is time you do not spend sanding.
- Ease sharp arrises. A light chamfer or small radius holds an even film. Coatings thin over a sharp edge, so a razor arris always shows a weak line.
- Go easy on the faces. Sanding through the factory skin exposes the open core across the whole panel and multiplies your priming work. A light key at 240 grit is enough.
How to seal MDF edges properly
Sealing MDF edges is the step that separates a trade finish from a rough one. Four methods work.
Four methods that work
- Purpose-made MDF edge sealer. Acrylic sealers formulated to fill and bind open fibre. Fast drying, easy to sand, and the default for volume work such as painting MDF skirting boards and architrave.
- Solvent-based primer. With no water in the carrier, it does not swell the fibre. Two coats worked into the edge with a sand between will close it.
- Fine surface or two-pack filler. Fill and sand flush for the flattest result. Standard in a spray shop, overkill for most second-fix work.
- Lipping. Iron-on tape or solid timber removes the problem instead of sealing it. The right call for shelf fronts, worktop edges and anything that takes knocks.
Why diluted PVA is the wrong choice
Thinned PVA turns up constantly in general advice and it does not belong on a paid job.
PVA stays sensitive to moisture after drying, so a water-based primer or topcoat over it can soften the layer and compromise adhesion. It also clogs abrasive instead of cutting cleanly. Purpose-made sealers cost little and remove the risk. Follow the manufacturer’s technical data sheet.
What is the best primer for MDF?
The best primer for MDF depends on the carrier, the site conditions and the specification.
Solvent-based primer undercoat
Minimal fibre raise, good build, strong adhesion and it sands well. The trade default for brush and roller work on raw board.
The trade-offs are longer drying times, solvent odour on occupied sites, and a tendency for oil-based products to yellow under brilliant white.
Shellac-based primer
Dries very fast, seals aggressively and blocks stains and resin bleed. Useful when you need to recoat within the hour.
It cures hard and brittle, so it suits stable interior joinery rather than anything that flexes.
Water-based acrylic MDF primer
Low odour, low VOC, quick recoat times, and increasingly specified on occupied and commercial sites.
The catch is fibre raise on any raw edge. It follows proper edge sealing rather than replacing it, and you should expect to de-nib after the first coat.
Two-pack spray primers and the isocyanate risk
High-build 2K primers sand flat and are the standard in a finishing shop. They also carry the most serious health requirements in this article.
Where the hardener is isocyanate-based, HSE is direct about it: isocyanate, typically in 2-pack paints, is the most common cause of occupational asthma. Spraying must be done in a properly designed booth or spray room, with air-fed breathing apparatus worn while mist is present, under a specific COSHH assessment with health surveillance in place.
Some acid-catalysed systems release formaldehyde during cure instead. Read the safety data sheet before the product reaches site.
Whichever route you take, check the VOC category on the tin. Decorative coatings sold in the UK are subject to maximum VOC content limits under the Volatile Organic Compounds in Paints, Varnishes and Vehicle Refinishing Products Regulations 2012, which have since been amended.

How to paint MDF step by step
- Acclimatise and inspect. Let boards settle in the installation environment. Reject damaged, swollen or damp panels.
- Cut and machine with extraction running. Sharp tooling, fine tooth count, RPE where required.
- Ease the arrises. Light chamfer or small radius on every exposed edge.
- Sand the edges. 120 to 180 grit to remove machining fuzz. Vacuum, do not brush.
- Seal every cut edge. Two coats on end grain and profiled sections.
- Cut back the sealed edges. 180 to 240 grit until the edge feels the same as the face.
- Fill. Fixing holes, joints and crushed fibre. Sand flush.
- Prime faces and edges. One full, even coat across the whole component.
- De-nib. 240 to 320 grit, then vacuum and tack off. This step decides how the finish feels in the hand.
- Apply two thin topcoats. Respect the recoat window. Two thin coats beat one heavy one every time.
What causes a rough finish on MDF?
A rough finish nearly always traces to one of six causes.
- Fibre raise on an unsealed edge. The most common by a distance.
- Dust in the wet film. Usually means cutting and finishing happened in the same space.
- Sanding through the face skin, which turns a low-absorbency surface into an open one.
- Over-thinning the first coat, so it sinks in instead of building a film.
- Recoating too early, trapping solvent and leaving a soft film.
- Coating a damp or unacclimatised board, which then moves after cure.
Sunken sheen along an edge is not a topcoat problem. It is an unsealed edge that has drawn the coating in. Cut back and reseal.
Spraying MDF: what changes
Spraying changes the method very little and raises the standard of preparation considerably. A sprayed film is thin and even, so anything left in the substrate shows.
The controls change more than the technique. Overspray puts coating mist through the whole work area, so ventilation, exposure control and RPE selection all need reassessing before the gun comes out.
Clearance times
If you are spraying in a booth or spray room, the clearance time matters as much as the equipment.
- The mist is invisible. It fills the space and spreads like smoke.
- Know your booth's clearance time and make sure everyone on site knows it.
- Keep the visor down until you are outside the spray area. Lifting it to check the film is one of the most common exposure routes.
- Elevated levels can remain during curing, not just while spraying.
A smooth MDF finish starts with careful edge sealing, controlled sanding, clean application, and safe spraying practice. TradeFox helps learners review painting and carpentry procedures through guided simulations they can revisit whenever they need more practice.
Final checks before you start
The process for how to paint MDF is not complicated, but it punishes shortcuts. Seal the edges, match the primer to the carrier and the site, extract the dust at source, and put the coats on thin.
Before the first cut, run through this:
- Technical data sheets read for every product in the system
- Recoat windows confirmed
- COSHH assessment covering machining, sanding and application
- Extraction tested and in date
- RPE face fit tests current
For anyone building into the trade, that last list is worth making a habit early. It is the difference between a job that passes inspection and one that does not.