

Masonry paint is one of the most misunderstood products on any site. It looks simple: open the tub, load the roller, cover the wall. But the coatings that fail early almost never fail because of the paint. They fail because of what sits behind the wall, what was skipped during prep, or a specification that fought against the physics of the substrate.
For working tradesmen, understanding those failure points is the difference between a job that lasts fifteen years and a callback within two winters. This guide covers what actually governs performance: breathability, weather resistance, surface preparation, and the mechanisms that cause coatings to peel.
Breathability: The Property That Decides Everything
The single most important characteristic of any exterior masonry coating is water vapour permeability, often shortened to breathability. A wall is not a sealed box. Moisture moves through solid and cavity walls constantly, driven by internal humidity, rising damp, and seasonal temperature swings. If the coating you apply traps that moisture inside the substrate, you have built a problem into the wall.
How UK Classification Works
Performance is classified under the BS EN 1062 series. That standard groups exterior masonry coatings by five properties:
- V class: permeability to water vapour (breathability).
- W class: permeability to liquid water (rain resistance).
- A class: crack-bridging ability.
- E class: film thickness.
- G class: gloss level.
Water-vapour transmission is measured to EN ISO 7783-2, and the results map onto the EN 1062-1 classification. The V scale runs from V1 to V3:
- V1 is high permeability, or vapour-open.
- V2 is medium permeability.
- V3 is low permeability, effectively vapour-tight.
As a widely used benchmark, a product is generally accepted as “breathable” only when it reaches at least V2 (medium) or V1 (high) water vapour permeability. This is the threshold applied under the EU Ecolabel criteria rather than a fixed UK legal definition, so always check the specific product data sheet. Anything rated V3 should be treated as vapour-tight regardless of what the label implies.
Why It Matters On Site
Trapped humidity raises the risk of mould growth, interstitial condensation, and, in reinforced concrete, corrosion of the steel behind the surface. On older solid-wall properties, lime renders, and historic brickwork, a low-permeability coating is one of the most common causes of long-term damage.
The rule is simple: match the coating to the wall. Breathable substrates need a breathable masonry paint.
Weather Resistance: Shedding Rain Without Sealing the Wall
Here is where the specification gets interesting, because a good coating has to do two apparently contradictory things at once. It must let water vapour escape from the inside while keeping driving rain out. That balance separates a properly engineered product from a cheap emulsion.
The W Class and Liquid Water
Liquid water permeability is measured under BS EN 1062-3, with the classification running through EN 1062-1. Note that the W scale runs opposite to intuition on the numbers:
- W1 is high liquid water permeability (poor rain resistance).
- W2 is medium.
- W3 is low permeability (good rain resistance).
The target for exterior work is W3, so the film sheds wind-driven rain rather than absorbing it. A correctly specified coating sits at the useful intersection: low liquid water permeability to resist rain, combined with medium to high vapour permeability so the wall can still dry outward.
CO2 and Crack-Bridging
Weather resistance is not only about water:
- Carbon dioxide permeability matters on concrete, because CO2 ingress drives carbonation, which eventually corrodes embedded reinforcement. This is tested to BS EN 1062-6 and is a genuine consideration on structural concrete work.
- Crack-bridging (A class) matters on substrates that move. Elastomeric and flexible coatings span fine hairline cracking without splitting, which is why they are often specified on rendered surfaces prone to shrinkage movement. On a stable, sound substrate you may not need that property, and paying for it can be an unnecessary cost.

Surface Preparation: Where Most Failures Are Built In
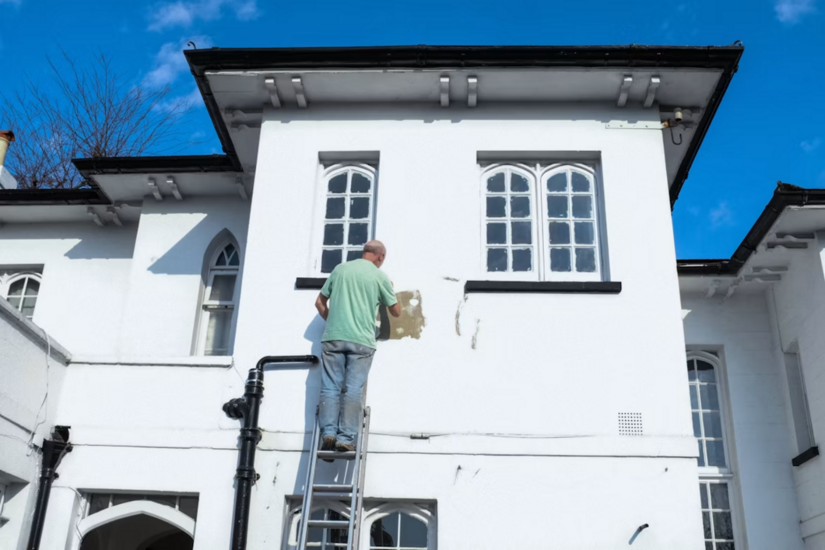
Ask any experienced decorator why a job failed and the answer is almost always prep. The coating is only ever as sound as the surface it bonds to. Rushing this stage is the most reliable way to guarantee a callback.
A defensible preparation sequence looks like this:
- Assess and diagnose first. Establish why the wall looks the way it does. Existing flaking, efflorescence, staining, and damp patches all tell you something. Painting over an unresolved damp problem simply hides it for a season.
- Remove all loose and failing material. Every flake of unsound existing coating has to come off. If the old paint is not adhering, your new coat will not adhere to it either.
- Kill and treat organic growth. Algae, lichen, and moss must be removed and treated with a proper fungicidal wash, then left for the manufacturer's stated dwell time.
- Clean back to a sound, dry substrate. The wall must be clean, structurally sound, and dry before coating. Applying over a damp substrate is a leading cause of early breakdown.
- Stabilise and prime where required. Chalky, friable, or highly porous surfaces need a stabilising primer or a manufacturer-recommended masonry primer to bind the surface and control suction.
- Make good repairs and let them cure. Render repairs, filler, and pointing all need to cure fully before overcoating. Fresh cementitious repairs are highly alkaline and can burn through coatings if painted too soon.
Always work to the coating manufacturer’s technical data sheet for that specific product. Overcoating times, primer compatibility, minimum application temperatures, and maximum substrate moisture content vary between systems.
Health and Safety: Dust, COSHH, and Legal Duties
Preparation is where the real hazards live, and this is not optional guidance. Dry cutting, grinding, sanding, scabbling, and abrading masonry, render, and concrete releases respirable crystalline silica (RCS), a fine dust that causes silicosis, chronic obstructive pulmonary disease, and lung cancer. The Health and Safety Executive estimates that silica exposure contributes to more than 500 construction worker deaths every year.
The Legal Framework
RCS exposure is controlled under the Control of Substances Hazardous to Health Regulations 2002 (COSHH). Key duties and figures:
- Employers must assess the risk and control exposure below the workplace exposure limit for RCS, which is 0.1 mg/m3 as an 8-hour time-weighted average, as published in HSE EH40.
- Because RCS is classified as a carcinogen, exposure must also be reduced as far below that limit as is reasonably practicable.
- Silica content varies by material. Concrete is typically 25 to 40 percent quartz, and sandstone can run as high as 90 percent, so the dust risk from prep is real and task-dependent.
Controlling the Risk
Control measures follow a clear hierarchy:
- Water suppression and on-tool extraction come first. These are the primary engineering controls.
- Respiratory protective equipment (RPE) supports those controls but does not replace them. HSE has been explicit that RPE alone is not adequate control.
- Tight-fitting RPE such as an FFP3 mask must be face-fit tested in line with HSE guidance (INDG479).
- Never dry sweep or use compressed air to clear silica dust, as this throws a hazardous cloud into the air. Use an H-class vacuum or wet methods.
- Health surveillance is required where there is a reasonable risk of workers developing silicosis.
Consult the HSE construction silica advice sheets for task-specific control detail before you start.
Lead Paint and Other Hazards
The sale of lead paint was banned in the UK from 1992 under the Environmental Protection (Controls on Injurious Substances) Regulations 1992. Any building predating that date may carry lead-based layers under newer coats, so test before disturbing old paintwork. Also follow fall-protection requirements when working at height, and store and dispose of coatings and washings in line with the product safety data sheet.
No unsafe practice should ever be traded for speed.
Why Walls Peel: The Failure Mechanisms
Peeling is a symptom, not a cause. When you understand the mechanism, you can prevent it rather than repaint over it. The common causes are:
- Trapped moisture and vapour pressure. The most frequent culprit. A vapour-tight or low-permeability coating over a damp or breathing wall traps moisture behind the film. As that moisture tries to escape, it builds pressure and pushes the coating off the substrate. Getting the V class wrong is a direct cause of peeling.
- Poor adhesion from inadequate prep. Coating applied over dust, chalk, algae, or an unsound existing layer never develops a proper bond. It looks fine on day one and lifts within a season.
- Painting over damp or in the wrong conditions. Applying over a wet substrate, below the product minimum temperature, or in the face of incoming rain traps water at the bond line.
- Substrate movement without a flexible system. On surfaces that move or crack, a rigid coating splits and lets water in behind the film.
- Salt and efflorescence. Soluble salts migrating to the surface crystallise under the coating and physically push it off. Efflorescence must be resolved, not painted over.
- Incompatible layers. A new coat applied over an incompatible existing coating, or over a primer it was never designed to bond with, can fail at the interface.
In almost every case, the fix is not a better tub of paint. It is correct diagnosis, correct preparation, and a coating specified to work with the wall’s moisture behaviour.
Specifying Correctly: A Quick Reference
For most exterior work on sound, breathable substrates:
| Property | Target class | Reason |
|---|---|---|
| Liquid water (W) | W3 | Sheds driving rain |
| Water vapour (V) | V1 or V2 | Lets the wall breathe |
| Crack-bridging (A) | A class where the substrate moves | Spans hairline cracks |
Reserve genuinely vapour-tight products for the narrow situations that call for them, and never default to them out of habit.
Good preparation and safe working practices make every decorating job more reliable. If you want to strengthen your practical construction knowledge, explore TradeFox’s interactive courses and build your skills one step at a time before your next project.
Final Word
Read the technical data sheet, prep to the standard the substrate demands, control the dust, and match the coating’s permeability to the wall. Do those four things and masonry paint becomes one of the most reliable, long-lasting finishes you can offer a client.