

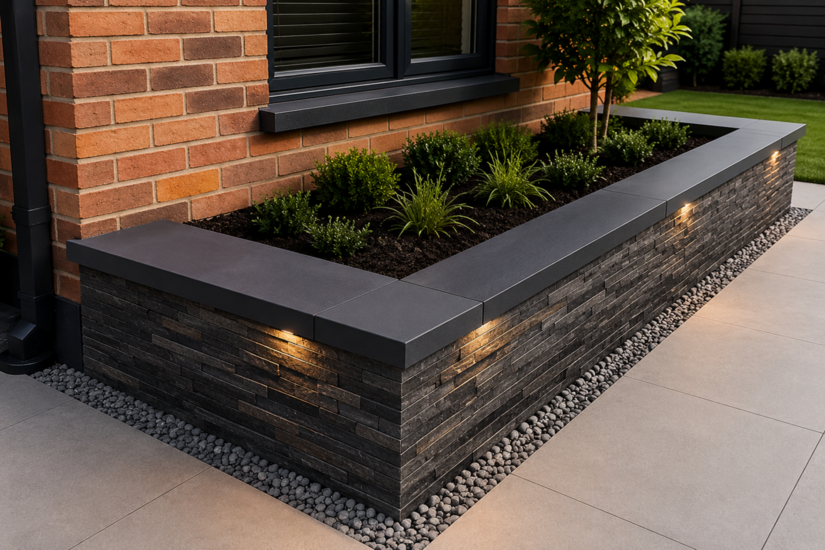
Coping stones protect brick walls by throwing rainwater clear of the masonry below, stopping water from soaking into the top courses and the bedding mortar where it causes the most damage. Fitted correctly, with the right overhang, a clean-throated drip and a properly bedded damp proof course, they form the first line of defence against saturation, frost damage and the slow failure of a wall from the head down. Get the detail wrong and the wall can fail faster than one with no protection at all.
This guide is written for bricklayers, groundworkers and anyone working towards the trade. It covers how these units work, the UK standards and regulations that apply, and the on-site details that separate a wall that lasts decades from one that needs taking down in a few years.
What is a Coping Stone and What Does It Do?
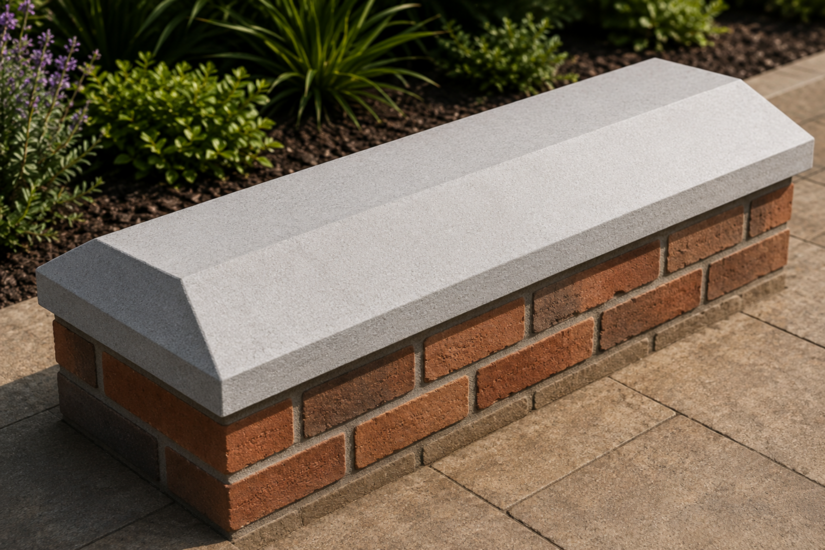
A coping stone is a unit fitted to the top of a free-standing wall, parapet or pier that sheds rainwater clear of the wall faces beneath it. The key word is “clear”. A true coping projects beyond both faces of the wall and carries a drip on the underside so water cannot track back into the masonry.
This is the difference between a coping and a capping, and it matters on site:
- A coping oversails the wall on both faces and directs water away from it.
- A capping sits flush and sheds water straight down the wall faces, offering far less protection.
When someone says they want a wall “protected from the top”, they almost always need a coping, not a capping. These units are made from precast concrete, cast stone, natural stone, clayware, or slate. Whatever the material, the job is the same: keep water off the top of the wall and away from the vulnerable courses directly below.
How Do Coping Stones Stop Water Damage?
Coping stones stop water damage by controlling where rainwater goes before the masonry can absorb it. They do this through three working features that have to be present together.
The overhang
The unit must project beyond the wall faces on both sides. That projection moves the point where water drips off away from the brickwork, so run-off lands on the ground rather than running down the wall. Without an adequate overhang, the coping is little more than a decorative cap.
The throated drip
On the underside of each overhang there should be a throat, which is a groove run along the length of the unit. Surface tension would otherwise pull water back along the flat underside and onto the wall face. The drip breaks that path and forces water to fall away.
On site this is the detail that most often fails. If the drip is not cleanly formed, or the overhang is too short, water tracks back under the coping and into the wall. Building control inspectors and warranty surveyors flag this regularly, so it pays to get it right first time.
The weathered top
The top surface is usually weathered, meaning it slopes either to one side (mono-pitch) or to both (twin-fall or saddleback). The slope moves standing water off the unit quickly rather than letting it sit and soak through the joints.
When all three features work together, the top of the wall and the bedding mortar stay protected. That keeps water out of the wall and away from frost. Saturated masonry that then freezes is one of the most common causes of spalled brick faces and blown mortar joints, so keeping the head of the wall dry protects the whole structure.
Why the Damp Proof Course Under the Coping Matters
A coping on its own is not a complete moisture barrier, and this is where a lot of walls quietly fail. Most coping materials are not fully impervious to water, and the bedded joints between units are a route for moisture even when the units themselves are sound.
For that reason a damp proof course (DPC) is bedded directly beneath the coping. Approved Document C of the Building Regulations, which covers resistance to moisture, treats this as a standard DPC location: masonry walls below a coping where the coping is made from a material that is not impervious to water. The code of practice for design and installation of DPCs in masonry is BS 8215, which includes dedicated details for DPCs beneath jointed copings and in parapet walls.
One important note on scope. Approved Document C applies to England only. The equivalents are the Technical Handbooks (Section 3) in Scotland, Technical Guidance Document C in Wales, and Technical Booklet C in Northern Ireland. They set very similar requirements, but confirm the right document for the project location.
A few points carry real weight on site:
- Use a flexible DPC at coping and parapet level. Parapets are exposed on both faces and move with heat and cold, so the DPC has to tolerate that movement without splitting. Rigid materials crack.
- Run it full width and continuous. The DPC must span the full width of the wall with adequately lapped joints, or it becomes a path for water rather than a barrier.
- Bed it on an even surface. Lay it on mortar free from sharp projections that could puncture it.
Parapet walls need extra care
On parapet walls the detail is more demanding still. Both skins are external and exposed, so the DPC line can act as a slip plane and the wall can move at that level over time. This is the “ratcheting” effect, where expansion is not fully matched by contraction and the masonry above and below the DPC slowly moves out of alignment.
Designers increasingly specify a purpose-made parapet cavity tray rather than a simple horizontal DPC for this reason. If you are working to a drawing that calls for one, fit it as detailed and do not substitute a flat DPC to save time.
UK Standards and Regulations That Apply
Coping stones are covered by recognised British Standards, and quoting them on a job protects you and gives the client confidence the work is specified correctly.
The core product standard is BS 5642-2, the specification for copings and cappings of precast concrete, cast stone, clayware, slate and natural stone. It sets out requirements for materials, mass, cross-section dimensions and tolerances. As a practical figure, manufacturer design guidance to BS 5642-2 (such as Ibstock’s) references a minimum mass of around 25kg per metre run where units are not mechanically cramped or fixed, because the weight itself helps hold the coping in place.
Where cast stone is involved, BS 1217 (Cast stone specification) becomes the governing standard following the amendments BSI issued in 2014 to resolve the overlap with BS 5642. Whether a cast stone unit needs UKCA marking (or CE where still accepted) depends on factors such as whether any dimension exceeds 650mm and whether the unit carries reinforcement or fixings, so check the manufacturer’s declaration of performance rather than assuming.
Wider design sits under the Eurocode 6 suite (BS EN 1996) with its UK National Annex and PD 6697. This is the reference for free-standing and retaining wall stability, including the height-to-thickness ratio that keeps a wall structurally sound. Never build a free-standing wall to an unsafe height for its thickness, whatever the coping spec, because the coping does not make an over-tall wall stable.
Fitting Coping Stones Correctly On Site
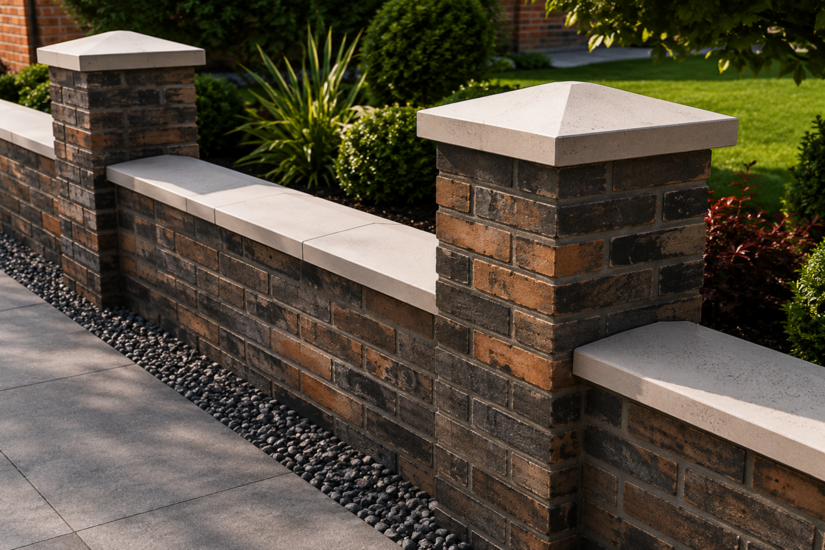
Specification only protects the wall if the installation follows it. The points below are where coping work most often goes wrong.
- Set out dry first. Lay the units out without mortar to check the run, the overhang on both faces and the cut units. Position equal cut units at each end and a whole unit at any free end, cutting against a pier where needed.
- Keep the overhang even. A coping that oversails 20mm one side and 5mm the other will channel water onto the short side. Consistent projection on both faces is what makes the overhang and drip do their job.
- Fill the joints solidly. Butter the joints fully as you bed each unit. Open or partly filled perp joints let water straight into the wall and undermine the whole point of fitting a coping.
- Use the fixings the manufacturer specifies. Mechanically retained systems rely on the correct fixings and a high-bond DPC for their stability.
- Continue movement joints through the coping. If the wall has movement joints, carry them up through the coping course. Bridging a movement joint with a rigidly bedded coping invites cracking.
Working safely with heavy units
Coping units are heavy and are often worked at height on a parapet or scaffold, so plan the lift before you start.
- Manual handling. Under the Manual Handling Operations Regulations 1992, assess the lift and reduce the risk of injury. Where lifting sockets or eyes are provided on heavier cast stone units, use them and use suitable lifting plant.
- Work at height. Under the Work at Height Regulations 2005, make sure the platform, edge protection and access are right before any unit goes up.
When Coping Stones Have Already Failed
Where an existing coping has failed, the cause is usually visible: a missing or short overhang, a blocked or absent drip, open joints, or a failed DPC letting water track in.
The repair sequence is straightforward:
- Strip the defective coping and any failed brickwork down to at least one course below the intended high-level DPC.
- Reinstate a sound, continuous DPC.
- Rebuild to current requirements, carrying any existing movement joints through the new work.
If the cause of failure is not obvious, get a structural opinion before rebuilding rather than repeating the original mistake.
Good coping stone installation depends on careful preparation, safe working, and attention to detail. Build your practical skills with TradeFox and practise the methods that support reliable work on site from the start.
Get the Detail Right From the Top Down
Coping stones are one of the highest-value details on any wall: cheap relative to the structure they protect, and unforgiving when fitted badly. Specify the right unit, bed a continuous flexible DPC beneath it, keep the overhang even and the drip clean, and the wall below stays dry for decades.