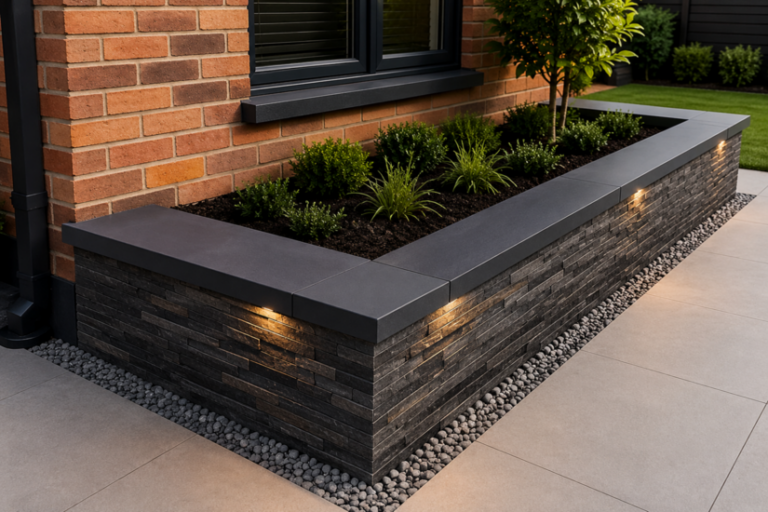
Pointing defines how a wall looks, how it sheds water, and how long it lasts before a follow-on contractor has to revisit it. Mortar joints account for roughly 17% of the surface area of a stretcher-bonded wall, so a poor finish does more than look amateur. It dictates the weather performance of the entire elevation.
This guide covers how to point brickwork to a professional standard. It runs from joint selection and mix specification through to weather windows, working at height, dust control, and the avoidable mistakes that lead to smearing, ghosting and callbacks.
The content is aimed at working tradesmen and apprentices building towards Level 2 and Level 3 bricklaying qualifications. It assumes you already understand basic trowel work and standard bonds.
Why Pointing Quality Matters
Mortar has one structural job and one weather job. It bonds the masonry units while allowing slight movement under load and thermal change. It also sheds water away from the face of the wall.
When a joint is poorly compacted, hollow, or finished with the wrong profile for the exposure zone, the wall absorbs water it should be shedding. That moisture causes efflorescence, spalling on freeze-thaw cycles, and accelerated deterioration of both the brick face and the mortar itself.
Two regulatory points worth flagging at the outset:
- Under the Construction (Design and Management) Regulations 2015, the contractor is responsible for buildability and durability decisions made on site.
- Approved Document A of the Building Regulations governs structural masonry decisions, including mortar selection in load-bearing walls.
Choosing the wrong joint or mix for the exposure category is not just a workmanship issue. It can become a liability one.
Joint Profiles And When To Use Them
Four profiles are in common use on modern UK brickwork: bucket handle, weather struck, flush, and recessed. Each has a specific application based on exposure, brick type, and the building’s age and character.
Bucket Handle (Half-Round)
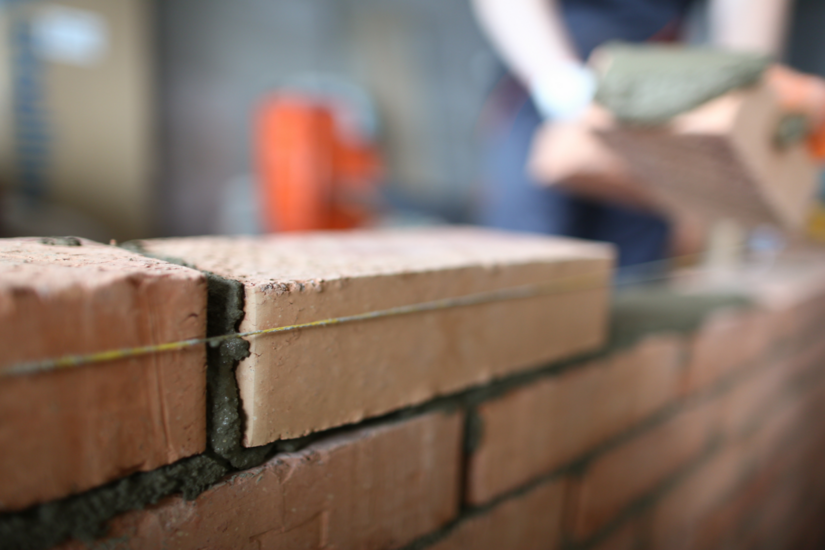
The most common joint on contemporary brickwork. It is formed with a half-round jointing iron or a length of hose, compressing the mortar into a concave profile that sits slightly back from the brick arris. Compaction during tooling closes the surface pores of the mortar, which significantly improves water resistance compared to an untooled flush finish.
Use bucket handle for:
- General domestic and commercial facing brickwork
- Sheltered and moderate exposure zones
- Cavity walls with standard fired-clay or concrete facing bricks
- Apprentice work where consistency across a large wall is critical, since the tool does most of the work
Weather Struck
An angled profile, sloping inwards from the top of the bed joint outwards to the brick face below. The geometry channels rainwater away from the bed joint rather than allowing it to sit and soak in. This makes it the strongest profile for water shedding and the right choice for exposed elevations, parapets, chimneys, and coastal work where wind-driven rain is a concern.
Weather struck is significantly slower to execute than bucket handle. Two-stage or “twice struck” variants are even more labour-intensive but produce a sharper shadow line, which is why you see them on heritage restoration and high-spec new builds.
Price the time honestly. A wall priced as bucket handle and finished weather struck will lose money.
Flush
Mortar is finished level with the brick face, cut off with the trowel edge or rubbed back with sacking once it has stiffened. Flush joints have lower compaction than tooled profiles, so they shed water less effectively.
They are appropriate for:
- Internal brickwork
- Sheltered external walls
- Aesthetic schemes where the bricks themselves are intended to dominate the visual reading of the wall
- Apprentice work where consistency across a large wall is critical, since the tool does most of the work
A shallow, slightly recessed flush finish (around 2 mm) is common on contemporary architectural brickwork.
Recessed (Raked)
The mortar is set back from the face of the brick, typically 3 to 5 mm, with the front face squared off. Recessed pointing creates strong shadow lines and emphasises the unit, but it exposes the top arris of the brick below to direct rainfall and reduces the wall’s resistance to water penetration.
Recessed joints should only be specified where the bricks are highly frost-resistant, conforming to durability designation F2 under BS EN 771-1. They should be avoided in severe exposure zones. Recessing deeper than 5 mm is poor practice on external work regardless of the brick rating.
Heritage Profiles
On listed buildings and pre-1919 stock you may encounter tuck pointing, bead, or struck-and-cut profiles. These are specialist finishes that require lime mortar competency and, in many cases, Listed Building Consent before any work begins.
If you have not been trained on lime, do not take on the work. Refer the client to a specialist or signpost them to Historic England guidance on appointing the right tradesman.
Mortar Specification
UK mortars are commonly specified using strength classes M1 to M12, where the number represents compressive strength in N/mm² at 28 days. This designation system was carried over from the old BS 5628 and is now harmonised under BS EN 998-2:2016, which also recognises higher classes (M15, M20) for specialist applications.
The principle that governs every mortar choice is simple. The mortar must be weaker than the brick it bonds. A hard cement-rich mix on a soft handmade brick will cause the brick face to crack and spall under thermal movement, because the mortar refuses to yield.
Common Site Specifications
- M4 (1:1:5–6 cement:lime:sand): general purpose external brickwork above DPC on most domestic builds
- M6 (1:½:4–4½): standard parapets, severe weather elevations, and most repointing on cement-built walls
- M12 (1:0:3 OPC:sand): manholes, retaining structures, and engineering brick below DPC. Acceptable for facing work only where the bricks themselves are engineering class
- NHL 3.5 lime mortar with sand (typically 1:2½–3): pre-1919 buildings, soft red bricks, listed properties
Cement Hydrates, Lime Carbonates
A point that catches out apprentices moving between modern and heritage work: cement-based mortars cure by hydration (chemical reaction with water). Lime mortars, by contrast, cure mainly through carbonation, absorbing carbon dioxide from the air over weeks and months. This is why lime mortars need much longer protection from rain and frost after placement.
For full classification detail, refer to the Mortar Industry Association guide to BS EN 998-2. For exposure category guidance, cross-reference PD 6697 and the Brick Development Association durability design note.
Mix by volume using gauging buckets, not by shovel. Shovelfuls are inconsistent. Inconsistent mixes produce patchy mortar colour once the wall has dried out, which is one of the most visible signs of a sloppy job.
Raking Out Existing Joints
For repointing work, the existing joint must be cut back to a depth of at least twice the joint height. The accepted minimums are 15 mm for flush finishes and 20 mm for tooled profiles. Shallower than that and the new mortar lacks the mechanical key it needs to bond and resist freeze-thaw stress.
Three methods are in common use:
- Hammer and plugging chisel, traditional, slow, low dust. Still the correct method for lime mortar and heritage work where blade chatter would damage the brick arris.
- Manual wheeled raker or quirk tool, effective only on soft, already-failing mortar.
- Angle grinder with diamond mortar rake, or oscillating multi-tool, fast on modern cement mortar, but generates significant respirable crystalline silica (RCS).
Dust Control Is Not Optional
Cutting cement-based mortar with power tools releases RCS. The HSE workplace exposure limit for RCS is 0.1 mg/m³ averaged over an eight-hour shift. HSE measurements of uncontrolled raking have recorded peak exposures around 5 mg/m³, which is fifty times the WEL.
Silicosis, COPD, and lung cancer are the long-term consequences. Silica is estimated to be responsible for over 500 construction-related deaths in the UK each year.
Your Legal Duties Under COSHH
Under the Control of Substances Hazardous to Health Regulations 2002, you must:
- Use on-tool extraction with an M-class or H-class vacuum
- Wear RPE with an assigned protection factor (APF) of at least 20, such as FFP3 disposable or a half-mask with P3 filter
- Use APF 40 (full-face P3 or powered respirator) for prolonged or enclosed-space raking
- Be face-fit tested for any tight-fitting RPE on the specific make and model, by a competent provider (the Fit2Fit scheme is the recognised accreditation)
- Be clean-shaven where the mask seals against the skin
- Use water suppression where on-tool extraction is not viable
Health Surveillance
If you employ others, health surveillance under HSE guidance G404 is a legal requirement where exposure is regular or significant. The Personal Protective Equipment at Work (Amendment) Regulations 2022 extended PPE duties to cover “limb (b)” workers, including many self-employed pointers. If you sub-contract, you cannot assume someone else owns the dust risk.
Working At Height
Pointing is almost always carried out from a scaffold, mobile tower, or MEWP. Falls from height remain the largest single cause of fatal injuries in UK construction.
The Work at Height Regulations 2005 require duty holders to:
- Plan and supervise all work at height
- Use the most suitable equipment for the task (collective protection like scaffolds before personal protection like harnesses)
- Ensure scaffolds are erected, altered, and dismantled only by competent persons (CISRS or equivalent)
- Inspect scaffolds before first use, after any alteration, and at least every seven days
- Confine roof and parapet pointing to operatives competent in edge protection and fall arrest
For chimney pointing, never work off a ladder. A properly inspected scaffold with full handrails and toeboards is the minimum standard. The cost is recoverable in the quote. The consequences of cutting that corner are not.
Weather Timing And Cold-Weather Working
Hydration of cement-based mortar stalls when temperatures fall. Industry guidance, reflected in the Brick Development Association good site practice notes, states that brickwork and pointing should not be carried out when the air temperature is below 3°C and falling. Working in marginal conditions risks frost damage to the green mortar, which presents weeks later as crumbling joints and bond failure.
Practical Temperature Rules
- Below 3°C falling: stop work, protect existing brickwork with hessian and polythene
- 3°C to 5°C: proceed only with protection and a stiffer mix; check the overnight forecast before leaving the wall exposed
- Above 25°C with direct sun or drying wind: dampen the joint before applying, shade the work, and consider an early start before the heat peaks
- Heavy rain : stop. Pointing in rain washes cement fines out of the surface and produces weak, lean joints that fail prematurely
Lime mortars need significantly longer protection in cold weather than cement-based mixes. NHL mortars can be vulnerable to frost damage for several weeks after placement, which is why most heritage repointing work is restricted to the period between late spring and early autumn.
The Method, Step By Step
Assuming raking is complete, dust extracted, the joints brushed clean, and a competent risk assessment is in place, the sequence below produces a consistent, durable finish.
- Damp the joints. Spray clean water until the brick edges are damp but not running wet. Dry brickwork sucks the moisture out of the fresh mortar before it has a chance to bond, producing a powdery, friable joint that fails within a season.
- Mix to a stiff, plastic consistency. Slightly drier than a bedding mix. The mortar should hold its shape on the trowel and not slump or run. Retempering stiffened mortar with extra water is bad practice and weakens the final mix.
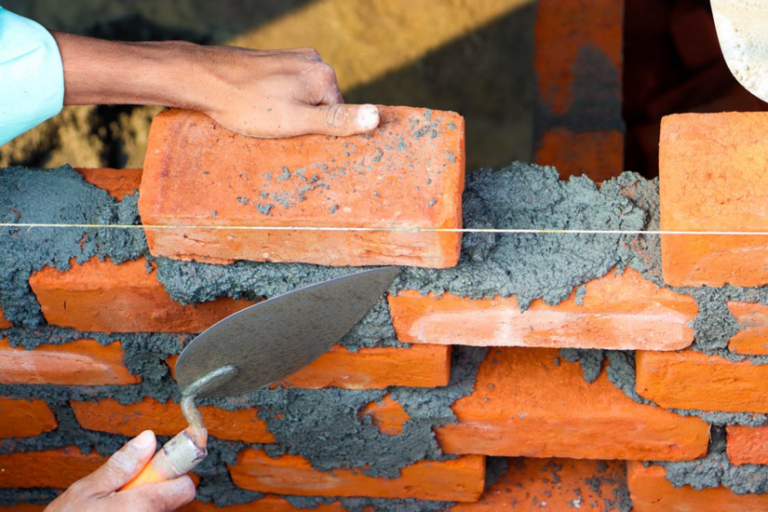
- Load the hawk and trowel. Use a pointing trowel sized to your joint width, usually 4 to 6 inches for standard 10 mm joints. A finger trowel or a tuckpointer's iron is preferred for narrow joints. Press the mortar firmly into the perpends first, then the bed joints, in layers if depth exceeds 20 mm.
- Compact thoroughly. Pressing the trowel hard against the back of the joint expels air voids. Voids collect water that then freezes, so a hollow joint is a future failure. Top the work up slightly proud of the brick face.
- Wait for the thumbprint stage. The mortar must stiffen before tooling. Press a thumb to the joint. When it leaves a clean print without sticking to your skin, the mortar is ready. This is typically 30 to 90 minutes depending on temperature, humidity, brick suction, and mix design.
- Tool to the chosen profile. Run the jointing iron firmly along the joint, perpends first, then beds. Maintain consistent pressure for an even shadow line.
- Brush off when the mortar has hardened further. Use a soft churn brush at a 45-degree angle to remove crumbs and loose particles. Brushing too soon drags wet mortar across the brick face and is the principal cause of smearing. Brushing too late leaves spoil that can only be removed with acid wash and a callback.
How To Avoid Smearing And Ghosting
Smearing is mortar dragged across the brick face. Ghosting is the pale residue that remains after smeared mortar has been brushed off, especially visible on dark or rustic bricks. Both are workmanship faults and both are avoidable.
- Never scrape the trowel up or down the brick face. Cut off excess parallel to the joint.
- Keep the trowel and tools clean throughout the day. Build-up on a jointer transfers to the wall.
- Use a hawk and load it carefully. Dropped mortar that hits the wall on the way down will mark it.
- Sheet the wall below the working area if you are on a lift. Cement splashes onto bricks below are unsightly and time-consuming to clean.
- Time the brush-off correctly. The window is roughly when the mortar has set firm but is still slightly green, often two to four hours after tooling depending on conditions.
- For stubborn ghosting on engineering or very absorbent bricks, a proprietary brick cleaner used per the manufacturer's COSHH data sheet may be needed. Mask the surrounding work and rinse thoroughly. Never use neat hydrochloric acid: the resulting damage to mortar joints often costs more to rectify than the original ghosting.
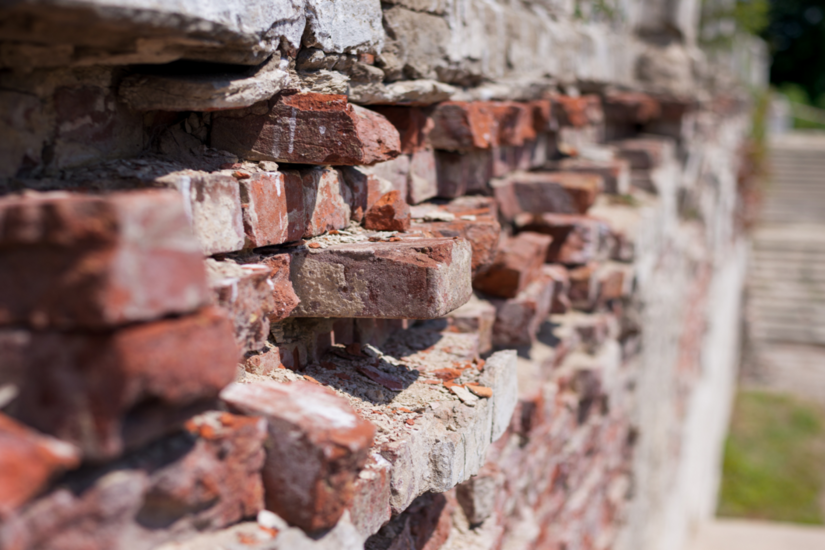
Common Defects To Recognise
A competent tradesman should be able to diagnose a failing wall on inspection. Watch for:
- Crumbling, friable mortar: Usually frost damage from work done in cold weather, or a mix that was too weak or over-watered.
- Cracking through bricks: The mortar is too strong for the units. The wall cannot accommodate movement, so the bricks take the stress.
- Efflorescence on joints: Soluble salts migrating to the surface, often from work done without adequate rain protection or from using unwashed sand.
- Cracks running along bed joints: Bond failure from insufficient joint depth, poor compaction, or contaminated raked-out joints.
- Hollow joints: Poor compaction during pointing. Tap with a small hammer; a flat dead sound indicates a void.
Learn the right timing, the right touch, and the right checks before you point. TradeFox helps you build the practical skills that keep brickwork cleaner, sharper, and easier to stand behind.
Final Thoughts
Pointing is a finishing trade where the difference between competent and excellent is measured in millimetres and minutes. The right joint profile for the exposure, a mortar weaker than the bricks it bonds, a working window that respects the weather, and a brush-off timed to the minute.
Learn how to point brickwork to that level and the work speaks for itself for half a century. Cut corners on the specification, the safety, or the timing, and the wall will tell on you long before then.