When you’re finishing walls and ceilings on a construction site or during a renovation, you’ve probably come across the term dry lining. It’s a method that’s become a favourite among builders, plasterers, and DIYers looking for a clean, fast, and cost-effective way to finish internal walls. But what is drylining, and why has it become so popular compared to traditional plastering methods?
In this guide, we’ll cover everything you need to know about drylining, from the types of systems used to the tools and materials involved, the benefits it offers, and what you need to consider before you do it yourself or hire a contractor. Whether you’re upgrading a single room or managing multiple sites, knowing about drylining will help you make more informed decisions.
What is Dry Lining In Construction?
At its simplest, drylining is a method of covering internal walls and ceilings with sheets of plasterboard instead of applying layers of wet plaster. The process skips the water-based materials that traditional plastering uses and instead uses mechanical fixings or adhesive to attach plasterboard to masonry or timber/metal framing.
The result is a clean, smooth surface ready for painting, tiling, or any other finish. Drylining doesn’t require the long drying time associated with wet plaster, which allows tradespeople to work faster, essential when time is of the essence.
You’ll see drylining used everywhere: new builds, commercial units, loft conversions, and even small home improvements. Whether it’s creating stud walls to divide a room or hiding unsightly brickwork, it gets the job done with minimal hassle.
Where is Drylining Typically Used?
Drylining isn’t limited to one type of project. You’ll find it being used across a wide range of settings, from new housing developments to office fit-outs and even in small home upgrades.
Anywhere there’s a need to tidy up the appearance of internal walls or improve insulation, drylining steps in as a practical solution.
In homes, drylining is commonly applied to bedrooms, living rooms, hallways, and sometimes kitchens, with some added prep in areas exposed to moisture.
For commercial spaces, it’s useful for creating quick partitions and hiding services like electrical cables and pipework. Builders also use drylining to form new stud walls, making it easier to reconfigure a layout without tearing down solid structures.
Different Drylining Systems
Not all drylining is done the same way. Depending on the building structure and what you’re trying to achieve, whether it’s sound control, thermal insulation, or just a smooth finish, different systems come into play.
Dot and Dab (Direct Bonding)
One of the most popular methods is dot and dab. It involves applying adhesive directly to a block or brick wall in dabs or dots, then pressing the plasterboard into place.
It’s quick, clean, and requires less framing, which makes it ideal for jobs where time is tight.
But it’s not the best option where walls are uneven or where you might need to run services behind the board. In those cases, a framed system might be a better fit.
Metal Frame Drylining
When precision and flexibility matter, metal framing is a strong alternative. Metal studs are used to create a framework that the plasterboard is then screwed into.
This is especially useful in commercial buildings and larger spaces where flat surfaces and sharp lines are important.
You’ll often see metal frames used in conjunction with insulation materials or acoustic layers for added fire resistance or soundproofing.
Timber Frame Drylining
Timber framing is still used in many domestic projects, particularly for internal partitions. It’s a bit more forgiving than metal when it comes to fixing and adjusting on the fly, and some tradespeople prefer working with it because of its familiar feel.
Timber frames can support both walls and ceilings, though they do require extra attention to moisture control to prevent water damage over time.
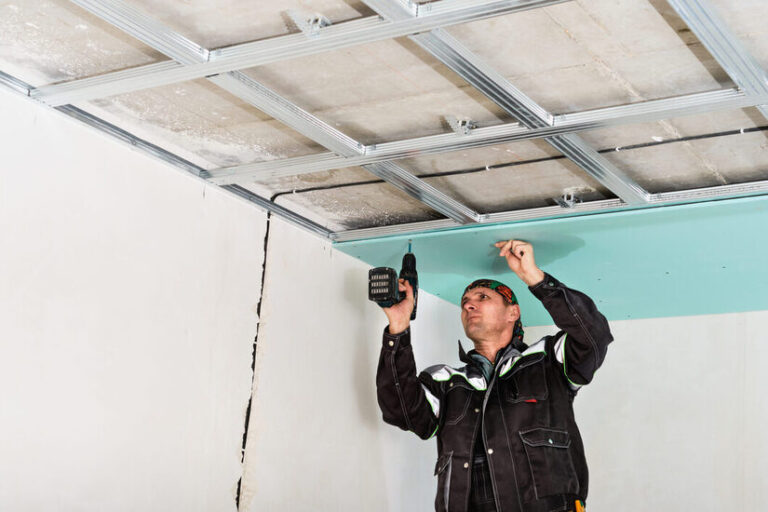
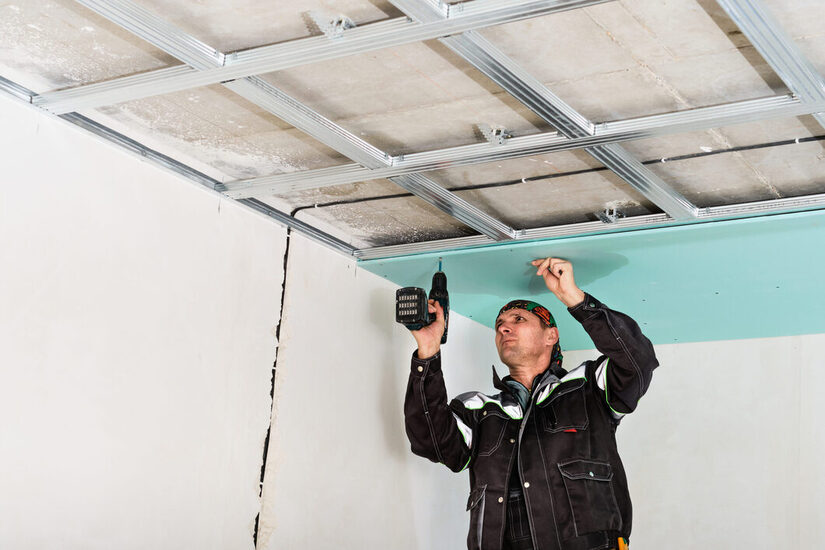
Ceiling Drylining
Drylining a ceiling involves fixing plasterboards overhead, not the most fun task, but worth it. A drylined ceiling gives a fresh, flat finish and can cover over uneven joists or old finishes. Builders often use thicker boards in these areas to prevent sagging and sound transfer between floors.
Materials Used In Drylining
Getting drylining right is all about choosing the right materials for the job. It’s not just about grabbing the first sheet you see at the supplier. Each space and condition requires specific boards and fixing solutions.
Types Of Plasterboards
Standard plasterboards are the go-to for most drylining jobs, but depending on the room’s need, other types may be better suited:
- Moisture-resistant boards are for kitchens, bathrooms, and utility rooms where humidity is a concern.
- Fire-resistant boards contain additives that improve fire performance, ideal for apartment buildings or stairwells.
- Acoustic boards help reduce noise transfer, often used in bedrooms or between semi-detached homes.
- Thermal insulated boards combine plasterboard with a foam or foil backing to help regulate room temperature, useful in loft conversions or external wall linings.
Choosing the right thickness of plasterboards also plays a big part. Thicker boards can improve impact resistance and reduce sound transmission, but they’re heavier and may require more support.
Fixing Tools And Materials
For dot and dab installations, drywall adhesive is applied in blobs to hold the board in place. When working with frames builders use special drywall screws to fasten the boards to timber or metal.
Joint tape and joint compound are used to cover the seams between boards, creating that smooth, seamless finish that homeowners expect. Once dried and sanded down the wall or ceiling is ready for paint or decoration.
To stay safe during all of this, especially when cutting boards, most tradespeople wear dust masks and safety goggles to avoid inhaling particles or getting debris in their eyes.
The Drylining Process: Step By Step
If you’re new to drylining, it may seem like a technical process. But when broken down into manageable steps, it becomes much easier to follow, whether you’re doing it yourself or managing a team on site.
Planning And Preparation
Before anything goes up on the wall, a proper layout is essential. This means measuring up the space, checking for a level surface, and identifying where electrical sockets, pipes or insulation need to be considered. If you’re drylining over a masonry wall, you’ll also want to check for moisture and unevenness, both can affect how well your plasterboards adhere.
Once the prep is done, it’s time to fix plasterboard to the surface. For dot and dab, you’ll apply drywall adhesive in thick blobs, spaced evenly across the wall.
Then each board is pressed onto the adhesive and adjusted to sit flush and level. With a frame system whether timber or metal the boards are fixed using screws spaced at regular intervals. This makes it easier to run cables and add insulation behind the boards.
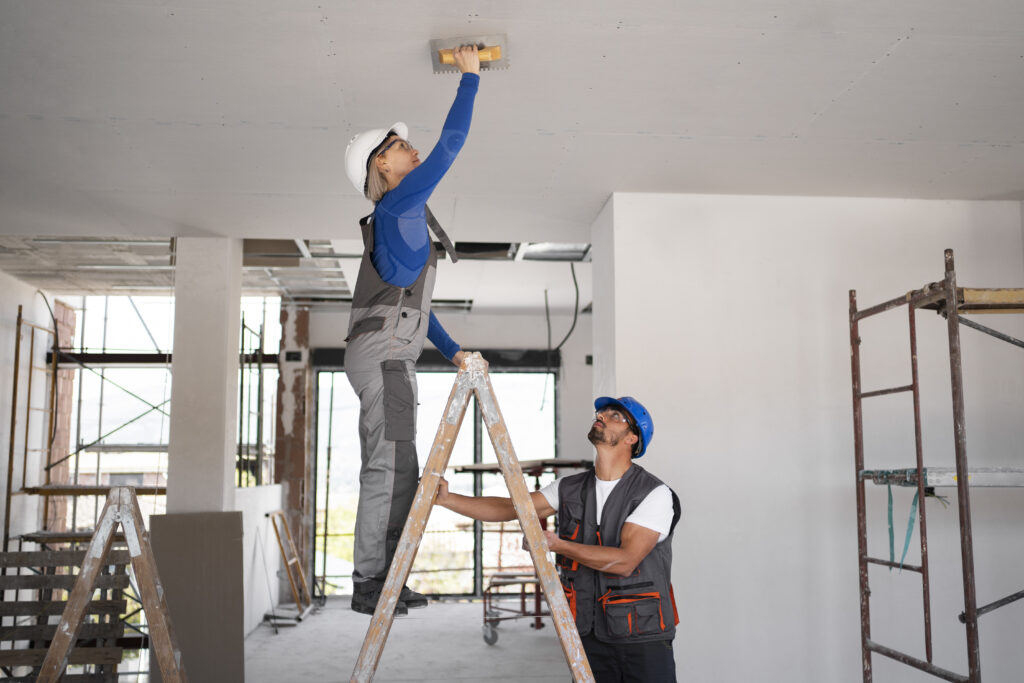
Taping And Jointing
Once the boards are all in place, the joints between them need to be covered using joint tape and joint compound.
This step is key for finishing walls cleanly and hiding the seams that would otherwise show through the paint. Two or three layers of compound are usually applied, allowing each coat to dry before sanding it smooth.
Some builders prefer to skim a thin coat of plaster over the entire surface, but in many drylining jobs, especially with tapered-edge boards, taping and filling is enough to get that crisp finish.
Benefits Of Drylining
Drylining is the go to for many builders and homeowners and for good reason. It ticks all the boxes for speed, performance and flexibility.
- Faster installation: No waiting around for layers of plaster to set. Once the boards are fixed and jointed, you can move straight into decorating.
- Cost-effective: Less labour, fewer materials, and minimal drying time make drylining more cost-effective than traditional plastering, especially on larger jobs.
- Thermal and sound benefits: With the right plasterboard, drylining helps improve insulation and reduce sound transfer between rooms or floors.
- Cleaner process: It’s a neater job with less mess and water on site.
- Adaptable: Need to move a wall or access wiring later? A dry lined wall is easier to adjust or repair than a solid plastered wall.
All of this makes drylining a good option for modern homes, offices, or refurbishing older properties.
Drawbacks And Things To Consider
While drylining has a lot to offer it’s not always the perfect solution. There are a few things to consider before choosing it over wet plaster.
- Hollow feel: Because boards are fixed over frames or adhesive walls can sometimes sound or feel less solid than traditionally plastered walls.
- Less impact resistant: In high-traffic areas or homes with children, interior walls may suffer dents or damage more easily.
- Precision needed for joints: If the taping and jointing isn’t done properly those seams can show through once painted, especially under natural light.
- Not ideal for all environments: In very humid areas like poorly ventilated bathrooms regular boards can suffer water damage if not properly sealed or protected.
That’s why it’s important to match the method and materials to the environment. In areas where durability or moisture protection is critical, investing in specialty boards and expert installation is worth it.
Drylining Vs Traditional Plastering: What’s The Difference?
If you’re weighing up drylining against wet plaster, it helps to know how they compare in practice. While both create smooth interior walls, the approach and results can differ in a few ways.
Drylining involves fixing plasterboard sheets to walls or frames and then covering the joints with compound and tape. It’s quicker to install, less messy, and the walls are ready to paint sooner. On building sites where time is of the essence, this method keeps projects on track.
Traditional plastering uses a mix of sand, cement, or gypsum applied in layers. It takes longer to apply and dry, but creates a denser, more durable surface. Plastered walls feel more solid and can be shaped to fit older or uneven structures.
So, which one should you choose?
- For speed, convenience, and a clean look, drylining is the way to go.
- For bespoke finishes, curves, or extreme durability, wet plaster may still be the winner.
In many modern builds, drylining is the standard. But in heritage renovations or high-end homes, traditional plastering still has its place.
Regulations And Building Standards
When drylining, you need to stick to building standards, especially for fire safety, acoustics, and insulation.
In the UK, Part B of the Building Regulations covers fire safety. This affects the choice of boards in stairwells, escape routes and between dwelling units. Many projects require fire resistance ratings of 30 to 60 minutes which means the boards need to be fire rated.
Part E covers sound insulation between walls and floors, especially in apartments or semi-detached housing. Using acoustic boards and proper installation methods meets these standards.
In commercial or large residential developments, inspectors will also check the thickness of plasterboards, how they’re fixed, and whether insulation meets thermal performance targets. Keeping up with code isn’t just about legal compliance; it’s about protecting the people who will live or work in the space.
If you’re unsure, working with experienced contractors and using digital tools like Tradefox can help with material tracking and keep your site on top of specs and safety.
Maintaining And Repairing Drylined Walls
Over time, even the best installed drylining may need touching up. Small knocks, scratches, or movements in the building can cause issues that are easy to fix if caught early.
Common Problems
- Cracks at the joints : often due to building movement or poor tape/compound work.
- Dents and holes : caused by furniture, tools, or general wear.
- Moisture stains or water damage, especially in kitchens or bathrooms, without moisture-resistant boards.
Fixing The Issues
Light cracks or dents can be sanded, filled, and repainted with minimal effort. More serious damage may require cutting out and replacing a section of the board. As long as the original installation was solid, repairs are usually quick and don’t require major disruption.
Regular inspections during decorating or maintenance cycles help spot issues before they spread. Keeping the property well ventilated also helps prevent damp problems behind the boards.
How Much Does Drylining Cost?
Cost is a big factor for anyone planning a renovation or build, and drylining is more cost-effective than other methods, especially when scaled across an entire home or commercial unit.
Typical Cost Breakdown
- Materials: Plasterboards vary in price depending on type; standard boards are affordable, fire-rated or insulated boards cost more.
- Fixings and finishes: Add in drywall adhesive, screws, compound and tape, these are low cost but essential.
- Labor: Dryliners charge by the square meter. Labor costs increase with high ceilings, complex shapes, or extra taping and sanding.
Key Cost Factors
- Size and shape of the space.
- Type and thickness of plasterboards used.
- Number of cut-outs for windows, sockets, or recesses.
- Whether the surface needs skimming.
DIYers can save on labor but need to factor in time, effort, and tools. Hiring a professional will give a better finish and fewer problems later on, especially if the property is being prepared for sale or rental.
Final Thoughts
Drylining has become the go-to method for finishing walls and ceilings in modern construction. It’s faster, cleaner, and more cost-effective than traditional plastering, making it ideal for both new builds and renovations.
Whether you’re creating stud walls, improving insulation, or hiding services, drylining offers a reliable, professional finish without long drying times or heavy mess.
By choosing the right plasterboard thickness, fixings, and method, whether dot and dab or framed, you can tailor the result to fit your space and budget. Just remember, good prep and careful jointing go a long way.
In short, drylining delivers smart solutions for the way we build today.