

Tiling is a big part of construction and home improvement. It gives walls and floors a clean finish and protects surfaces from water, dirt, and damage. From kitchen backsplashes to bathroom floors and outdoor patios, tiles add style and durability.
But if you’re just starting out with tiling, it can feel a bit overwhelming. One thing that makes it easier? Having the right tools. This guide walks you through the essential tools every beginner tiler needs, what they’re for, and how they help you get the job done.
What Is Tiling And Why It Matters
Tiling is the process of placing tiles made from ceramic, porcelain, glass, or stone onto a surface using adhesive and grout. It protects walls and floors and makes them easier to clean. When done right, tiling turns dull or uneven surfaces into something strong and beautiful.
But it’s not just about sticking tiles to a wall. Tiling involves precision, planning, and application. Every step, measuring, cutting, placing, spacing, and grouting, relies on specific tools that make the job smoother. Without the right gear, even a small job can get messy fast.
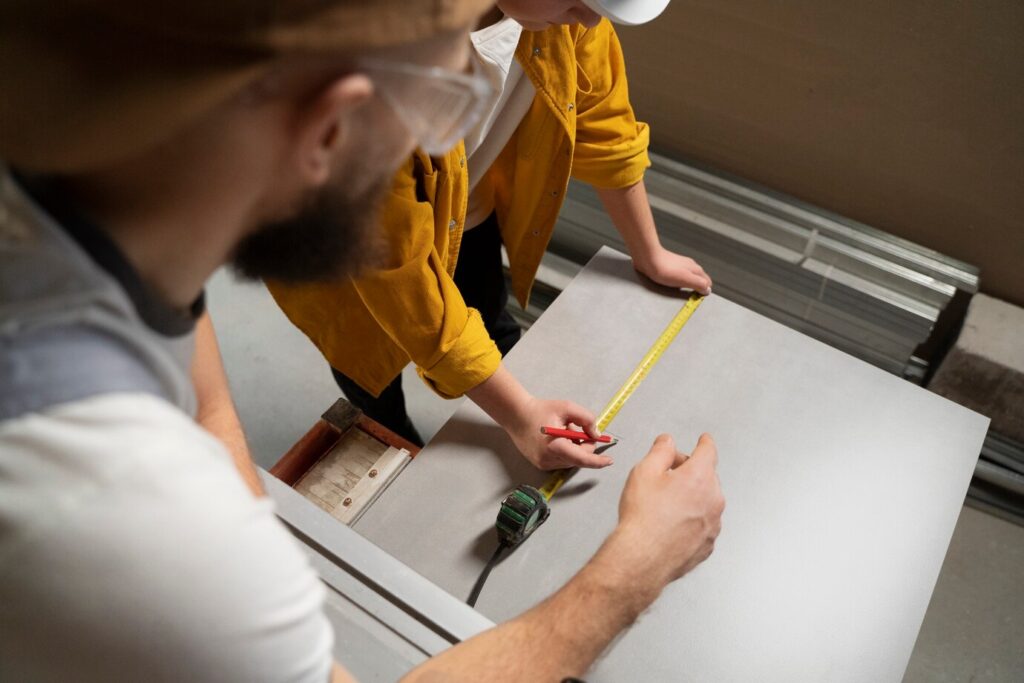
Planning and Measuring Tools
Here’s what you need to start:
- Tape Measure: Used to measure wall height, floor width, and total surface area. Helps you calculate how many tiles you’ll need.
- Spirit Level: Make sure your lines are straight and surfaces are level. Crooked tiles are hard to fix later.
- Chalk Line: Great for marking long straight lines on walls or floors. Keeps everything lined up properly.
- Pencil or Marker: For marking cuts, measurements, or layout points directly on tiles or surfaces.
- Square Ruler: Ensures corners and edges are perfectly square, especially important at the start of a layout.
Laying out your tile pattern ahead of time avoids last-minute changes that could throw everything off.
Cutting Tools
Basic tile-cutting tools include:
- Manual Tile Cutter: Ideal for straight cuts in ceramic and porcelain tiles. It scores the surface, then snaps the tile cleanly.
- Tile Nippers: Useful for small cuts or curved edges, great when cutting around pipes or odd shapes.
- Wet Saw: A powered tool with a water-cooled blade. Cuts through thick or hard tiles like stone with smooth, clean edges.
- Angle Grinder: Helpful for detailed or custom cuts that can’t be done with a standard cutter.
- Hole Saw Attachment: Used with a drill to create circular holes in tiles for plumbing or fixtures.
If you’re just starting, a manual tile cutter and tile nippers will cover most needs. As projects get more complex, a wet saw can save time and effort.
Adhesive Application Tools
Tools you'll need:
- Notched Trowel: This spreads adhesive onto the wall or floor in even ridges. Notch size depends on tile size, bigger tiles need deeper ridges.
- Margin Trowel: A smaller trowel that helps apply adhesive in corners, tight spots, or for touch-ups.
- Mixing Bucket and Mixing Paddle: Used for preparing adhesive or mortar. Powdered adhesives need to be mixed with water.
- Rubber Mallet: Helps tap tiles into place without cracking them. It ensures good contact with the adhesive underneath.
Working cleanly and methodically here prevents tiles from shifting and saves you from messy corrections later.
Grouting Tools
Grouting tools include:
- Grout Float: A soft rubber tool is used to press grout into the gaps between tiles. Helps spread grout evenly.
- Grout Sponge: Used to wipe off extra grout from the tile surface. It should be damp, not soaking wet.
- Grout Finishing Tool: Shapes and smooths the grout lines for a cleaner look.
- Clean Water Buckets: Keep at least two buckets of clean water nearby to rinse your sponge and tools as you work.
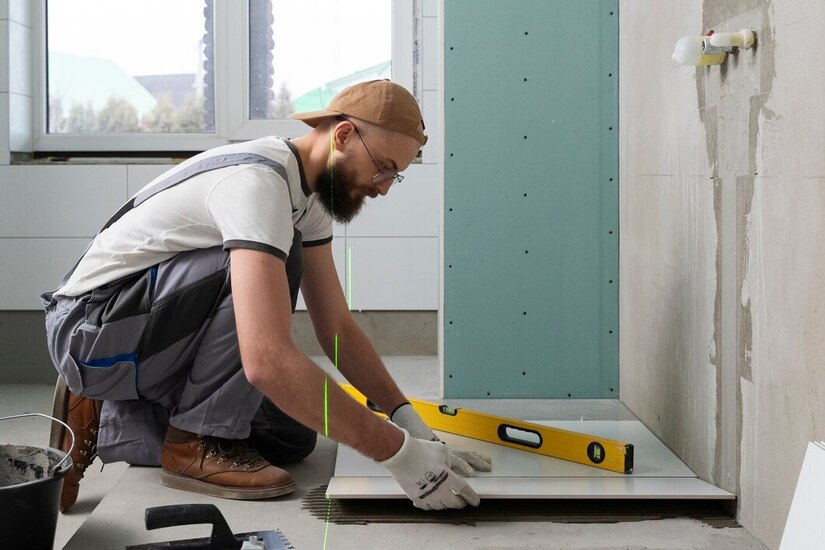
Tile Spacing And Alignment Tools
- Tile Spacers: Small plastic pieces are placed between tiles to keep gaps even. Choose spacer sizes based on the look you want and the type of grout.
- Tile Leveling: Clips Prevent tiles from shifting or sitting at slightly different heights. Helps create a flat, even surface.
- Laser Level: Projects a perfectly straight line across walls or floors. Great for long runs of tiles or feature walls.
Taking your time with alignment pays off, fixing crooked tiles is much harder once the adhesive sets.
Cleaning And Finishing Tools
Here’s what helps during the final stage:
- Scraper or Razor Blade: Removes any dried adhesive or grout without scratching the tiles.
- Microfiber Cloths: For wiping down tiles and removing haze or dust.
- Caulking Gun: Applies silicone or caulk where tiles meet walls, tubs, or countertops.
- Sealant Applicator: Spreads tile or grout sealant evenly, helping protect against stains and moisture.
Finishing touches are often overlooked, but they make your tiling project last longer and look more polished.
Safety Gear For Tiling
Must-have safety gear:
- Safety Glasses – Protect your eyes from chips, dust, or splashes.
- Work Gloves – Keep your hands safe while cutting or handling tiles.
- Knee Pads – Save your knees during long hours of tiling floors.
- Dust Mask – Prevents inhaling dust from cutting or mixing.
Even small projects can pose risks, so it’s worth using safety gear every time.
Optional Tools To Make Things Easier
- Wet Vacuum – Helps with quick cleanup, especially if you’re using a wet saw.
- Workbench or Tile Table – Provides a stable surface for accurate tile cutting.
- Tile Hole Marker – Makes marking out exact cut lines or holes much faster.
- Storage Organizer – Keeps all your small tools and accessories in one place.
Add tools as needed based on the projects you’re taking on.
Beginner’s Tile Kit Checklist
- Tape Measure
- Spirit Level
- Chalk Line
- Manual Tile Cutter
- Tile Nippers
- Notched Trowel
- Grout Float
- Grout Sponge
- Buckets
- Tile Spacers
- Margin Trowel
- Rubber Mallet
- Safety Gear (glasses, gloves, knee pads)
You can rent specialty tools like wet saws if you don’t want to buy them right away.
Tips For First-Time Tilers
- Dry-lay your tiles to see how they fit
- Plan your layout before applying adhesive
- Mix small batches of grout to avoid waste
- Keep tools clean between steps
- Watch tutorial videos for tool usage tips
- Practice cuts on spare tiles first
Every project builds confidence. You’ll get better with each job.
Conclusion
Tiling is a skill that pays off in both function and appearance. Whether you’re working on a kitchen wall or a bathroom floor, using the right tools helps you avoid frustration and get great results. This beginner’s guide gives you the knowledge to start your first tiling project with confidence.
The more you work with these tools, the easier it gets, and soon, what once felt tricky will become second nature.
Frequently Asked Questions
A beginner should have a tape measure, notched trowel, manual tile cutter, tile spacers, grout float, and a sponge. These tools help with measuring, cutting, placing tiles evenly, and finishing the grout properly.
Yes, for basic projects with standard ceramic tiles, a manual tile cutter is often enough. A wet saw becomes useful when you need cleaner cuts or are working with harder materials like stone.
Yes. Tile spacers help keep gaps between tiles even, which is important for both appearance and proper grouting. They also make alignment easier during installation.
Trowel size depends on your tile size. Larger tiles need deeper notches to hold more adhesive. Check the tile box or adhesive packaging for suggestions, or ask at your local supply store.
Yes. Eye protection, gloves, and knee pads are all important. Tiling tools can be sharp, and long hours of kneeling can cause strain. Safety gear helps protect you and makes the job more comfortable.


